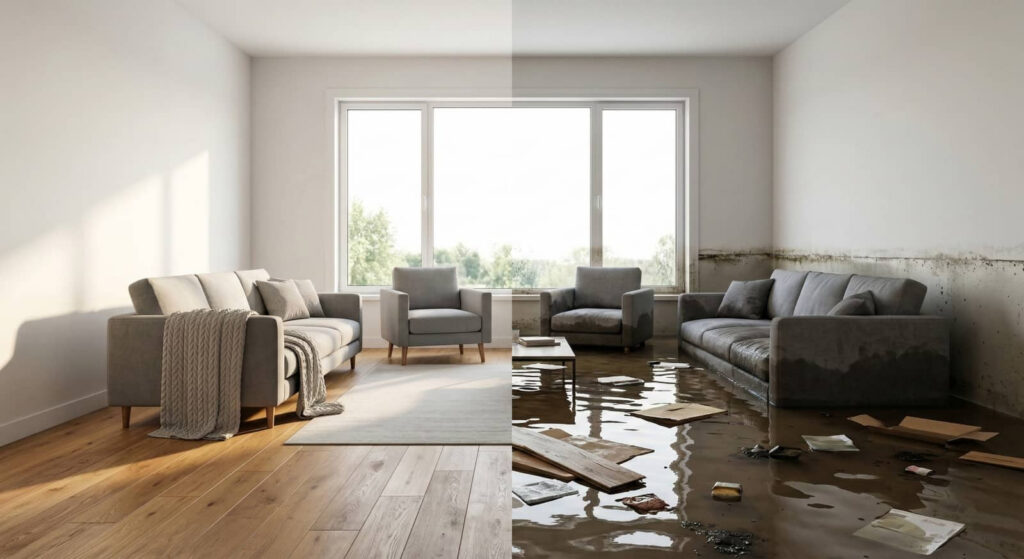
When water slips in, do you stop it fast, or let damage spread? You should shut off the source, remove standing water, and document affected areas right away. Then you can deploy air movers and dehumidifiers to speed drying and limit secondary damage. Hidden moisture still matters, though, because it can stay trapped in walls and under floors—exactly where the next problem starts.
Key Takeaways
- Stop the water source immediately and remove standing water to prevent further damage.
- Contain affected areas and isolate wet materials to limit moisture spread and contamination.
- Use air movers, dehumidifiers, and heat to speed structural drying.
- Inspect hidden spaces with moisture meters to find trapped water in walls, floors, and insulation.
- Confirm drying is complete before repairs to avoid trapped moisture and secondary damage.
The First Steps in Water Mitigation
The first steps in water mitigation start with stopping the source, evaluating the affected areas, and removing standing water as quickly as possible.
You then document visible damage, note affected materials, and identify what you can safely access.
In water mitigation, you should isolate wet contents, lift lightweight items, and protect clean surfaces from additional contamination.
Use extraction equipment on floors, carpets, and hidden pockets where water collects.
Check moisture levels in walls, trim, and subfloor areas so you know where drying work must begin.
You’re not handling this alone; a careful, methodical response helps your property stay on track for recovery.
If you act quickly and stay organized, you give your home or business the best chance to return to normal with less disruption.
How Water Mitigation Stops Damage Spreading
Once you’ve stopped the source and removed standing water, water mitigation slows secondary damage by controlling where moisture can travel and how long materials stay wet.
You contain affected zones, protect clean areas, and isolate porous materials before water wicks into framing, trim, and subfloors. You also remove saturated items that can spread contamination or stain adjacent surfaces.
Quick board-up of openings, targeted containment, and careful demolition keep microbes and odors from migrating through the property.
By documenting affected materials and moisture patterns, you make informed choices and keep your team aligned.
This approach preserves more of your structure, limits hidden damage, and gives your home or business a clearer path back to normal.
How Drying Equipment Removes Moisture
After you’ve contained the wet areas and removed saturated materials, drying equipment takes over to pull remaining moisture out of surfaces and the air.
You’ll usually rely on air movers, dehumidifiers, and sometimes heat to speed evaporation and capture vapor before it reabsorbs.
Air movers create focused airflow across floors, walls, and contents, lifting moisture from the surface layer.
Dehumidifiers then draw humid air through cold coils or desiccant media, condense or absorb the water, and release drier air back into the space.
This cycle lowers relative humidity, so materials dry faster and more evenly.
When you run the equipment correctly, you protect structural components, reduce odor and microbial risk, and keep the recovery process steady.
You’re not alone; this system helps you regain control.
Find and Dry Hidden Moisture
You need to locate trapped moisture behind walls, under baseboards, and in other concealed areas where damage can keep spreading.
Use targeted drying to treat wall cavities, then check floors and carpets for damp padding, subflooring, and residual moisture.
Once you find these hidden pockets, dry them fully so you can limit microbial growth and stabilize the structure.
Locate Trapped Moisture
Hidden moisture often lingers in wall cavities, under flooring, inside insulation, and around baseboards, so you need to inspect beyond the visible wet area.
Use a moisture meter to map readings across floors, trim, and drywall, then compare them to dry-reference spots. Feel for cool surfaces, soft boards, or a musty odor, since these often signal trapped water.
Remove vent covers, lift edge carpet if needed, and check behind furniture or stored items that can block airflow. Mark every wet zone clearly so your drying plan stays organized and your team stays aligned.
If readings stay elevated, keep dehumidifiers and air movers running until levels match normal conditions. Careful tracking helps you protect the space, reduce secondary damage, and move recovery forward with confidence.
Dry Wall Cavities
Wall cavities can hold moisture long after the surface looks dry, so you need to open the right access points and verify conditions inside the assembly. You can remove baseboards, outlet covers, or small inspection panels to check insulation, framing, and backing.
Use a moisture meter to compare readings at different heights and adjacent dry areas. If you find elevated moisture, increase airflow into the cavity with controlled removal of wet drywall sections, then dry the framing directly.
Don’t trap humidity by sealing openings too soon. Track temperature, relative humidity, and moisture content until readings stabilize.
When you work this way, you protect the structure, reduce secondary damage, and stay aligned with the crew moving toward recovery together.
Check Floors And Carpets
Even when the surface looks dry, floors and carpets can hold moisture in padding, underlayment, and subfloor layers, so you need to inspect beyond what you can see. Use a moisture meter to map wet spots, then lift carpet edges and test seams, corners, and connections.
If the pad feels damp or the floor reads above normal, keep airflow moving and add dehumidification right away. You’re not guessing; you’re confirming drying progress with data.
- Check for discoloration, odors, and cool areas.
- Pull back carpet only where it’s safe and documented.
- Replace materials that stay wet after targeted drying.
When you work this way, you protect your space, reduce hidden damage, and stay aligned with a crew that knows recovery depends on precision, not assumptions.
Protect Floors, Walls, and Belongings
Quick action can help protect floors, walls, and belongings before water causes more damage. You should move furniture, rugs, electronics, and stored items out of the wet zone, or raise them onto clean blocks if you can’t relocate them.
Place aluminum foil or plastic tabs under furniture legs to keep staining and wicking from spreading. Use clean, dry towels or absorbent pads along baseboards, door frames, and cabinet edges to limit surface moisture.
Remove wall hangings and contents from low shelves to reduce contact with damp surfaces. Keep walkways clear so you can inspect for new seepage and avoid tracking water across dry areas.
Label saved items and group them by room so you stay organized, preserve access, and support a smoother recovery process for everyone involved.
When Water Mitigation Turns Into Restoration
Once you’ve stopped active water intrusion and moisture readings are within target levels, mitigation is complete.
You then need structural drying to verify that framing, subfloors, and cavities are dry before repair work starts.
At that point, restoration can begin, and its scope should match the documented damage and the timing required to prevent secondary deterioration.
Signs Mitigation Is Complete
You’ll know water mitigation is complete when the structure is dry, stable, and no longer at risk of secondary damage. At that point, you can shift from emergency control to planned restoration with confidence.
You should see no active water intrusion, no visible pooling, and no spreading stains or odor that suggest ongoing moisture. Materials should stay intact, and removed contents should no longer threaten adjacent areas. Your team can then document the condition and close mitigation tasks.
- Damaged water sources are shut off and secured
- Affected areas remain clean, contained, and accessible
- No new deterioration appears after monitoring
When these signs line up, you’re ready to coordinate repairs, because your property has moved beyond mitigation and into recovery.
Structural Drying Requirements
Structural drying is complete when materials have reached target moisture levels, indoor conditions have stabilized, and the structure no longer supports hidden damage or microbial growth.
You verify this by checking subflooring, framing, drywall, insulation, and finishes with calibrated meters, then comparing readings to dry standards for each material.
You also track temperature, relative humidity, and airflow so dehumidifiers and air movers keep working efficiently.
If readings stay consistent across multiple inspections, you’re seeing true drying, not surface-only progress.
This step protects your property and helps you stay confident that moisture won’t linger inside assemblies.
When your team documents acceptable conditions, you’ve moved beyond mitigation and into a stable recovery phase.
Restoration Scope And Timing
When moisture readings return to dry standards and the building no longer shows active loss conditions, water mitigation ends and restoration begins. At this point, you shift from drying to rebuilding, and your scope should match verified damage, not assumptions.
You’ll document all affected materials, compare them to baseline conditions, and prioritize safe, code-compliant repairs.
- Remove unsalvageable drywall, insulation, or flooring.
- Repair or replace damaged finishes, trim, and contents.
- Verify systems, including electrical, HVAC, and plumbing, before closeout.
Timing matters because premature restoration can trap hidden moisture and cause secondary failure.
When you stay aligned with inspections, measurements, and crew communication, you protect your property and join a process built for clean, confident recovery.
Frequently Asked Questions
How Quickly Should Water Mitigation Begin After Flooding?
You should begin water mitigation immediately, ideally within 24 hours of flooding, to reduce moisture spread, mold growth, and structural damage. Fast action helps you protect your property and keeps recovery moving smoothly.
What Safety Risks Should Homeowners Avoid During Mitigation?
You should avoid electrical shock, contaminated water, mold exposure, unstable flooring, and hidden structural damage. Don’t enter energized rooms, breathe airborne spores, or use damaged appliances. Wear protective gear and isolate the area promptly.
How Is Contamination Level Determined in Floodwater?
You determine contamination by testing floodwater for sewage, chemicals, and microbial load, then classifying it by source, exposure, and visible debris. You’ll use that rating to choose safer cleanup methods and protective gear.
Which Belongings Can Usually Be Saved After Water Damage?
You can usually save hard, nonporous items like metal furniture, glass, sealed wood, ceramics, and some electronics if you dry them fast. You’ll often salvage photos, documents, and clothing if contamination’s low.
What Permits Are Needed for Major Water Damage Repairs?
You’ll usually need building, electrical, plumbing, and mechanical permits, plus demolition approval if structural work’s involved. Your local building department sets the rules, so you’ll want to check before repairs sprint ahead like floodwater.
Final Thoughts
When you begin water mitigation, you’re closing a floodgate before the river reaches every room. You stop the source, lift standing water, and set air movers and dehumidifiers to work like steady winter sun. You check hidden moisture in walls and under floors, because unseen dampness can still feed damage. When readings return to safe levels, you move from mitigation to restoration, protecting surfaces, contents, and the structure with confidence.