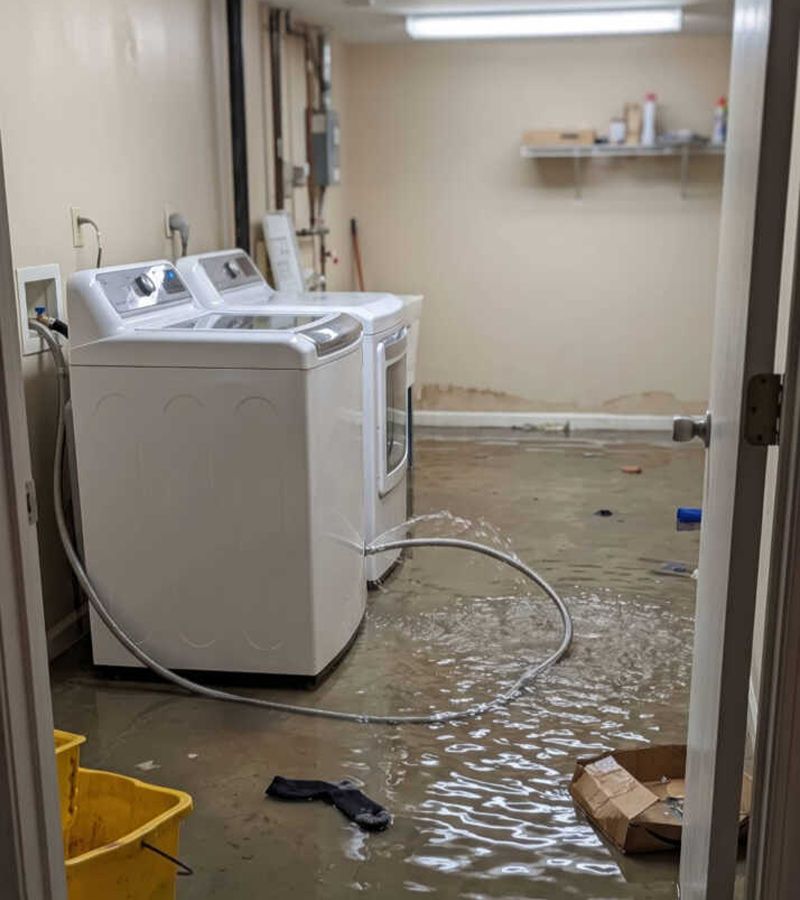
A burst pipe looks sudden, but proper water damage repair is a controlled sequence. You need to assess moisture spread, isolate affected areas, and lower humidity before hidden damage turns into mold or structural loss. Some materials can be dried and saved; others must be removed on sight. You’ll also need to verify that drywall, insulation, subfloors, and electrical systems are safe before restoration starts—and that’s where the real decisions begin.
Key Takeaways
- Shut off the water, map all affected finished areas, and document moisture with photos, meter readings, and inspection of walls, ceilings, and flooring edges.
- Dry the area immediately with air movers and dehumidifiers, keep humidity below 60 percent, and isolate wet zones to slow mold growth.
- Remove saturated porous materials that cannot dry safely, including contaminated drywall, insulation, carpet padding, and damaged tack strips.
- Test drywall, hardwood, and subfloor for swelling, delamination, rot, or loss of structural stability before deciding on repair or replacement.
- Inspect electrical circuits and HVAC components exposed to water, keep power isolated to wet areas, and restore only after confirmed dry and clean.
How to Assess Burst Pipe Water Damage
Before you plan any repair, assess burst pipe water damage methodically by confirming the water source is shut off, identifying affected areas, and determining how far moisture has spread beyond visible staining.
Use a moisture meter, infrared camera, and outlet tester to map wet drywall, flooring, trim, and insulation. Document readings room by room, photograph damage, and note material types, since restoration decisions depend on porosity and structural response.
Check ceilings below upper-level leaks, wall cavities near supply lines, and flooring junctions where water travels unexpectedly. Wear gloves, eye protection, and nonconductive footwear if electrical exposure is possible.
How to Stop Mold Before Repairs Begin
Once you’ve mapped the wet areas, stop mold growth by lowering moisture fast: set air movers and dehumidifiers, remove saturated porous materials that can’t be salvaged, and keep indoor humidity below 60 percent.
Use a hygrometer to verify conditions, and check hidden cavities with moisture meters so your team addresses every damp zone.
Isolate the affected area with plastic sheeting if contamination is possible, and run exhaust air safely outdoors when practical.
Wear gloves, eye protection, and an N95 or better respirator before disturbing wet debris.
Clean nonporous surfaces with detergent and water, then dry them completely; don’t rely on bleach as your primary method.
Inspect daily, document readings, and adjust equipment until moisture trends downward.
These disciplined steps help you protect the space and everyone working in it.
What Can Be Dried, Saved, or Replaced?
With moisture trending down and the area contained, you can sort materials by what drying can realistically recover and what removal will prevent later failure.
Start with category, exposure time, and structural change. Solid wood trim, framing, and many tile or metal surfaces often recover if they remain dimensionally stable and cleanable. Insulation, swollen particleboard, delaminated laminate, and rusted fasteners usually don’t.
You should test rather than guess. Use moisture readings, probe hidden cavities, and document odor, staining, warping, and loss of bond.
Carpet may be salvageable after clean-water exposure if backing, pad, and subfloor dry promptly; pad replacement is common. Hardwood can sometimes be saved with controlled drying before cupping locks in.
When materials can’t dry safely, removing them protects your home and everyone relying on your repair plan.
How to Repair Water-Damaged Drywall
You’ll first assess the drywall to determine whether moisture exposure caused swelling, softening, or contamination that requires replacement.
Next, you’ll remove all saturated sections with proper PPE and controlled cuts so you don’t disturb wiring, plumbing, or hidden mold growth.
Once the cavity is dry and cleared, you can install new panels, tape seams, and finish the surface to restore a safe, stable wall assembly.
Assess Drywall Damage
Before you cut or patch anything, inspect the drywall systematically to determine how far the burst-pipe leak spread and whether the board is still structurally sound.
Wear gloves, eye protection, and a respirator if staining or odors suggest contamination. Check for sagging, swelling, softened paper facing, nail pops, tape separation, and crumbling gypsum.
Use a moisture meter to compare suspect areas with unaffected sections nearby. Mark the perimeter of elevated readings so your team can track the wet zone accurately.
Probe gently around outlets, baseboards, and corners, where water often migrates first. Document discoloration patterns, texture changes, and any musty smell, because these signs help confirm hidden damage.
If the drywall remains firm and readings normalize, you can plan repairs confidently with the same disciplined standard professionals follow.
Remove Saturated Sections
Once you’ve mapped the wet zone and confirmed the drywall won’t recover, cut out every saturated section so hidden moisture doesn’t stay trapped in the wall cavity.
Shut off power to nearby circuits, wear gloves, eye protection, and a respirator, then score clean lines with a utility knife.
Open the wall at least 12 inches beyond staining or softness, and stop at framing whenever possible to keep removal controlled.
Use a drywall saw carefully, checking for wiring, plumbing, and insulation as you go. Remove wet fasteners, soggy backing, and any detached tape or crumbling joint compound.
Bag debris immediately to limit contamination and keep your workspace safe.
Install And Finish Panels
Measure the opening carefully, then cut replacement drywall to match the removed section so the panel fits tight without forcing the edges.
Verify framing is dry, sound, and mold-free before fastening. Position the panel, maintain factory edges where possible, and drive drywall screws into studs at consistent intervals, keeping fasteners slightly dimpled, not tearing the face paper.
Next, apply joint tape over every seam and cover it with a thin first coat of joint compound. Let it dry fully, then sand lightly while wearing eye protection and a respirator.
Add wider finish coats to feather the repair into surrounding surfaces. After final sanding, inspect with side lighting, seal with primer, and repaint to restore a uniform finish.
You’ll produce a durable, code-conscious repair your home can rely on daily.
How to Repair Wet Insulation
You should first assess the insulation for saturation, contamination, and loss of R-value after the burst pipe area has dried.
If it’s wet or compromised, remove it with proper PPE, discard unsalvageable sections, and install dry replacement material that matches the assembly.
To prevent mold growth, make sure the cavity is fully dry, clean, and sealed before you close the wall or ceiling.
Insulation Damage Assessment
Because wet insulation can trap moisture against framing and conceal microbial growth, you should assess it only after the affected area is dry enough for accurate inspection and the surrounding materials have been evaluated.
Wear gloves, eye protection, and a respirator, then verify insulation type, thickness, and location.
Check for matting, compression, staining, odors, debris, or delamination that indicate reduced thermal performance or contamination.
Use moisture readings from adjacent framing, sheathing, and drywall to judge whether hidden dampness likely affected the insulation.
Compare suspected sections with unaffected areas so your findings stay consistent and defensible.
Document cavity conditions, vapor retarder integrity, and any signs of air leakage pathways.
Removal And Replacement
Once inspection confirms the insulation can’t be salvaged, remove the wet sections systematically so you don’t spread contamination or leave moisture trapped in the assembly.
Shut off power to affected circuits, wear gloves, eye protection, and a respirator, and isolate the work area with plastic sheeting.
Open wall or ceiling cavities carefully, then pull out saturated batt insulation without compressing it.
Bag debris immediately and dispose of it according to local requirements.
If you’re dealing with blown-in insulation, use a HEPA-filtered vacuum designed for construction recovery.
Inspect framing and fasteners for remaining moisture before closing the cavity.
When readings meet dry standards, install replacement insulation that matches the original R-value and facing orientation.
You’ll restore thermal performance, protect the assembly, and keep your repair aligned with professional practice.
Preventing Mold Growth
After wet insulation is removed or verified salvageable, mold prevention depends on controlling moisture at the source and keeping materials below conditions that support microbial growth.
You should confirm the pipe repair holds, then dry framing, sheathing, and adjacent finishes to target moisture content with meters, not guesswork.
You’ll protect your space by maintaining airflow, running dehumidifiers, and filtering exhaust with HEPA equipment when contamination is possible.
Clean nonporous surfaces, discard unsalvageable porous debris, and avoid sealing damp cavities.
If you apply antimicrobials, follow label directions, ventilation requirements, and contact times exactly.
Check humidity daily and keep it under sixty percent, preferably lower during restoration.
Before closing walls, document dry readings and inspect for staining or odor.
These steps help you restore safely and confidently as part of a careful, capable community.
How to Repair Water-Damaged Flooring
Two factors determine how you’ll repair water-damaged flooring: the flooring type and the extent of saturation left by the burst pipe.
After drying, inspect for cupping, delamination, staining, loosened adhesive, and elevated moisture readings. You’ll get the safest, most consistent results by isolating damaged sections and replacing only materials that have lost structural stability or sanitary condition.
For carpet, remove pad and any contaminated tack strips; clean or replace the carpet based on category and fiber response.
For engineered wood or laminate, replace swollen planks and preserve stable adjacent boards.
For solid hardwood, sand and refinish only after moisture levels normalize.
For vinyl or tile, reset loose sections and replace compromised adhesive-bonded pieces.
Wear gloves, eye protection, and respirators as needed, and document repairs so your whole household stays aligned.
How to Repair Subfloors After a Leak
After the area is fully dry, you should inspect the subfloor for swelling, rot, delamination, and loss of structural integrity.
Use proper PPE and verify moisture readings before you decide whether the material can stay or must be removed.
If sections are unsalvageable, you’ll need to cut them out cleanly and replace them with matching subfloor material secured to code.
Assessing Subfloor Damage
Once the area is fully dry, you should inspect the subfloor for swelling, delamination, soft spots, fastener corrosion, and mold growth, since these conditions indicate whether the material can be dried in place or must be removed.
Use a moisture meter to compare affected sections with dry reference areas nearby. Probe edges, seams, and penetrations first, because they trap moisture longest.
Walk the floor slowly and mark deflection, squeaks, or spongy movement. Check fasteners for rust staining, uplift, or loss of holding strength.
If you find microbial growth, isolate the area and wear proper PPE before closer examination. Document every reading, photo, and symptom so your team can make consistent decisions.
Replacing Unsalvageable Sections
Cut out any subfloor section that stays swollen, delaminated, mold-damaged, or structurally soft after drying, because leaving compromised material in place can transfer movement to the finished floor and trap residual contamination.
Mark joist centers, snap straight cut lines, and set blade depth to avoid nicking framing, wiring, or plumbing. Wear eye protection, gloves, and a respirator whenever dust or suspected microbial residue is present.
Remove damaged panels cleanly, then inspect joists for rot, fastener corrosion, and moisture. If readings remain elevated, continue drying before rebuild.
Install matching thickness material, orient panels correctly, and leave manufacturer-recommended expansion gaps. Glue and fasten edges to sound framing or approved blocking so every seam is supported.
When you rebuild this way, you protect the whole assembly and keep your project aligned with professional standards.
How Water Damage Affects Trim, Doors, and Cabinets
Trim, doors, and cabinets often show hidden water damage even when walls and floors appear stable. You may notice swollen edges, delaminated veneer, joint separation, or soft fiberboard panels after drying.
Moisture wicks into end grain, hinge mortises, and toe-kicks, where finishes slow evaporation and trap dampness. That trapped moisture can distort fit, weaken fasteners, and support microbial growth behind enclosed surfaces.
- You feel frustrated when a door suddenly sticks and won’t latch.
- You worry when base trim cups, pulls away, or stains reappear.
- You feel unsettled when cabinet boxes sag or shelves lose load capacity.
- You gain confidence when you document damage, verify moisture readings, and isolate affected components.
When to Repair Electrical and HVAC Systems
After you assess damage to doors, trim, and cabinets, check building systems before any finish repairs begin.
You should address electrical and HVAC components once affected areas are dry enough for safe inspection and access. If water reached outlets, switches, fixtures, junction boxes, air handlers, registers, or low-voltage controls, treat those systems as potentially compromised until they’re evaluated.
You protect your home best by sequencing repairs carefully. Keep power isolated to wet circuits, then inspect for corrosion, sediment, insulation breakdown, and contamination inside equipment and wiring paths.
For HVAC, confirm ducts, filters, blower compartments, and control boards are clean and dry before restarting airflow. Repair or replace damaged components before you close walls or reinstall finishes.
That disciplined order helps everyone involved restore the space with confidence and consistent safety.
How Long Repairs Take and When to Hire a Pro
Timeline matters when you plan water damage repair after a burst pipe, because drying, inspection, and material replacement each depend on moisture readings, contamination level, and how much of the assembly was affected.
Most finished-area repairs take days for drying, then several more for demolition, cleaning, and rebuild. You should hire a pro when water reached insulation, framing, electrical pathways, or HVAC cavities, or when category 2 or 3 water is involved.
- You want confidence that hidden moisture won’t return.
- You need documented readings to protect your household.
- You deserve safe demolition without spreading contaminants.
- You belong with people who restore correctly the first time.
If materials stay wet beyond 48 hours, or odor, staining, or warping persists, professional assessment becomes the safer, faster choice for everyone involved.
Frequently Asked Questions
Will Homeowners Insurance Cover Burst Pipe Repairs in Finished Areas?
Yes, your homeowners insurance often covers sudden burst pipe damage in finished areas, but it usually won’t cover neglected maintenance or the pipe itself. You should verify exclusions, document losses, and coordinate safe drying and repairs promptly.
How Much Does Water Damage Repair Usually Cost?
Like a triage chart, you’ll usually pay $1,500–$5,000, though extensive repairs can exceed $10,000. You should budget by material, contamination risk, and labor scope, so you’ll protect your home and everyone depending on it.
Can I Stay in My Home During Water Damage Repairs?
Yes, you can sometimes stay home during water damage repairs if affected areas are isolated, utilities are safe, and air quality is controlled. You’ll need contractor guidance, hazard monitoring, and a clear plan for disruptions.
What Documents Should I Keep for Insurance Claims?
Keep photos, videos, repair estimates, receipts, an itemized inventory, your policy, correspondence, and temporary housing costs; insurers reject roughly 10% of property claims yearly, so you’ll strengthen your file, document everything promptly, and stay organized.
How Can I Prevent Pipes From Bursting Again?
Insulate vulnerable pipes, seal air leaks, keep heat consistent, and monitor pressure so you reduce freezing and overpressure risks. You’ll protect your home by draining exterior lines, servicing valves, and installing leak detection sensors.
Review
When you handle water damage repair after a burst pipe in finished areas, move methodically: verify moisture levels, remove compromised materials, dry structural cavities, and restore systems only after you’ve confirmed safety. Don’t rush hidden areas—mold can begin growing within 24 to 48 hours after water exposure, which makes early containment critical. If electrical, HVAC, or subfloor damage extends beyond surface finishes, you should bring in a qualified restoration professional to protect your home’s structure, air quality, and safety.