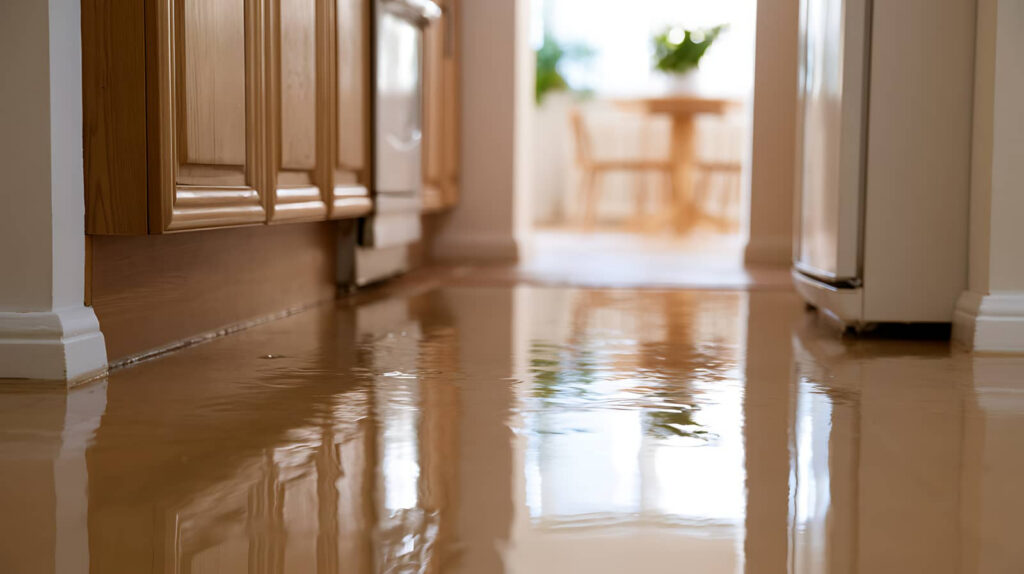
When water enters your home from a leak, flood, or soaked material, Water Damage Repair should begin quickly and follow a clear sequence. You first identify the source, stop active intrusion, and measure how far moisture has spread into floors, walls, and contents. From there, drying, cleaning, and material decisions must be made with safety and structural performance in mind. The next steps determine whether the damage stays contained or continues to advance.
Key Takeaways
- Stop the water source, shut off electrical hazards, and extract standing water immediately to limit spreading damage and make the area safe.
- Inspect all affected materials with moisture meters to map wet areas, identify contamination level, and document swelling, staining, or corrosion.
- Set up containment and begin controlled drying with air movers and dehumidifiers, verifying progress regularly until moisture targets are reached.
- Clean and sanitize affected surfaces, then decide repair versus replacement based on structural stability, contamination, and whether materials can dry safely.
- Begin restoration after drying and safety checks are complete, with timelines depending on damage severity, material removal, permits, and rebuild needs.
What Does Water Damage Repair Include?
Water damage repair includes the controlled steps needed to return a structure, its materials, and key systems to a safe, stable condition after water intrusion. You assess affected areas, document conditions, and identify hazards that could threaten your household or team.
Water damage repair also covers moisture mapping, containment setup, and removal of unsalvageable materials.
You then clean, disinfect, and dry structural components with calibrated equipment and verified procedures. You inspect insulation, drywall, flooring, framing, and electrical or HVAC interfaces for compromised performance.
Throughout water damage repair, you track moisture readings, protect indoor air quality, and confirm that repaired assemblies meet safety and stability requirements.
When Should Water Damage Repair Start?
Repairs should start as soon as the area is safe to enter and you’ve stopped the water source, because damage spreads quickly through porous materials, cavities, and connected building systems.
If power hazards, structural instability, or contamination are present, you should secure the space first and follow proper safety controls before any repair work begins.
Once immediate risks are controlled, you should begin repair-related action without delay to limit swelling, corrosion, microbial growth, and bond failure in finishes and assemblies.
Fast response helps protect materials that are still salvageable and supports a more orderly restoration sequence.
You’re not overreacting by moving quickly; you’re following best practice that protects your property and the people who share it with you.
Acting early keeps your environment safer, more stable, and easier to restore together.
How Is Water Damage Assessed?
How do professionals assess water damage without missing hidden risks? You begin with a structured inspection that maps affected rooms, materials, and moisture pathways.
Technicians classify the water source, measure humidity, and use moisture meters, infrared cameras, and thermal imaging to locate damp areas behind walls, under floors, and inside cavities. You also document staining, swelling, corrosion, and microbial growth indicators.
Next, you evaluate how deeply water migrated into drywall, insulation, wood, and subfloors. You compare wet readings to dry standards, identify salvageable versus unsalvageable materials, and record safety concerns like weakened ceilings or electrical exposure.
This method gives you and your restoration team a shared understanding of damage severity, repair scope, and drying priorities, so everyone works from the same evidence-based plan together.
Why Must You Stop the Leak First?
Before any drying or rebuilding starts, you must stop the leak because active intrusion keeps materials wet, spreads damage, and can make every downstream repair fail.
If water still enters, moisture migrates into cavities, insulation, framing, and finishes, increasing contamination risk, structural stress, and electrical hazards. You protect your property, your budget, and everyone involved by isolating the source first.
You should shut off supply lines, secure roofs or openings, and have qualified professionals address damaged plumbing, appliances, or building envelope failures.
This first control step establishes safe working conditions and gives your repair team a stable baseline for moisture readings and repair planning. It also helps prevent hidden deterioration, microbial amplification, and repeated insurance complications.
When you stop the leak first, you move forward together with confidence and control.
How Are Water and Debris Removed?
Start by extracting standing water with pumps, wet vacuums, or truck-mounted units sized to the loss, because rapid removal limits absorption, reduces structural loading, and lowers contamination spread.
You’ll isolate affected zones, shut off electrical hazards, and wear appropriate PPE before entering.
Next, you remove sludge, silt, and broken contents in a controlled sequence, documenting conditions as your team goes.
Non-salvageable debris gets bagged, labeled, and carried out to prevent cross-contamination.
You’ll lift loose flooring, detach damaged base trim when required for access, and clear blocked drains or sumps.
For contaminated losses, you use dedicated tools, establish clean-to-dirty pathways, and disinfect equipment after contact.
Throughout removal, you verify moisture migration boundaries, protect unaffected rooms, and maintain safe egress, so everyone works together under a consistent, professional standard.
How Are Wet Materials Dried?
Deploy air movers, dehumidifiers, and targeted heat in a controlled drying setup that matches the affected materials, room volume, and measured moisture load. You create airflow across wet surfaces, lower indoor humidity, and pull vapor from framing, drywall, flooring, and insulation without overheating sensitive components.
You verify progress with moisture meters, hygrometers, and thermal imaging, then adjust equipment placement as conditions change. You may remove baseboards, drill access points, or lift carpet edges so trapped moisture can escape from wall cavities and subfloors.
You isolate affected zones with containment when needed to protect unaffected areas and maintain drying efficiency. You also monitor electrical safety, structural stability, and equipment temperatures throughout the process.
How Are Damaged Areas Cleaned and Sanitized?
Clean and sanitize damaged areas by first removing debris, residues, and contaminated materials that can’t be safely restored. Then treat exposed surfaces with the appropriate cleaning agents and disinfectants for the water category involved. You’ll wear gloves, eye protection, and respiratory protection when conditions warrant, because safe work practices protect everyone on site.
Next, you’ll HEPA-vacuum loose particulates, clean soils from framing and finishes, and apply antimicrobial products according to label directions, dwell times, and ventilation requirements.
You should scrub nonporous and semi-porous surfaces thoroughly, rinse if required, and document each step for consistency and compliance. If odors remain, you’ll address their source rather than masking them.
When Should Materials Be Repaired or Replaced?
You need to assess how far water has compromised each material, including its structural stability, contamination level, and drying potential.
If a material can’t be dried, cleaned, and verified as safe, you should replace it instead of attempting repair.
You also need to act within the proper restoration window, because early decisions reduce secondary damage, control hazards, and improve recovery results.
Extent Of Material Damage
Severity determines whether a material can be repaired or must be replaced. You assess damage by measuring moisture depth, exposure time, contamination level, and loss of structural integrity.
Surface dampness differs from saturation inside drywall, insulation, subfloors, or framing. If fibers swell, fasteners corrode, finishes delaminate, or wood begins to warp, the material’s condition has changed beyond appearance alone.
You also inspect how far water traveled and whether hidden cavities stayed wet long enough to support microbial growth. Category 1 water may affect materials differently than contaminated water from sewage or flood sources.
As part of a safety-focused restoration team, you document readings, probe assemblies, and compare affected areas to dry standards. That method helps your property group make informed, consistent decisions quickly and confidently together.
Repair Versus Replacement
When drying data, contamination category, and structural condition align, repairs can proceed; when they don’t, replacement is the safer and more durable choice. You should compare moisture readings, material porosity, visible deterioration, and any Category 2 or 3 exposure before deciding.
Repair works when framing remains sound, drywall has limited wetting, finishes can be cleaned, and insulation hasn’t collapsed or trapped contaminants.
Replacement becomes necessary when swelling, delamination, corrosion, microbial growth, or loss of structural integrity affects performance. Porous materials that absorbed contaminated water usually can’t be reliably restored.
You protect your space best by following objective criteria, not guesswork. That disciplined approach keeps your home consistent with industry expectations and helps everyone involved work from the same safety-first standard for durable, code-conscious outcomes and long-term confidence.
Timing For Restoration
Once emergency extraction and stabilization are complete, repair or replacement should begin as soon as moisture readings, contamination controls, and material condition support safe work. You shouldn’t wait for visible dryness alone.
Your team should verify drying goals with meters, inspect for microbial risk, and confirm affected assemblies are stable enough for reconstruction before closing cavities or reinstalling finishes.
If materials remain structurally sound, cleanable, and within drying standards, you can schedule repairs immediately. If swelling, delamination, corrosion, staining, or contamination persists, replacement is usually safer.
You also need to coordinate electrical clearance, HVAC cleaning, and containment removal in the correct sequence. Acting at the right time protects indoor air, limits secondary damage, and helps everyone involved follow a process you can trust together.
How Long Does Water Damage Repair Take?
You can’t estimate water damage repair time accurately until you assess the severity of the damage and identify safety risks.
You’ll also need to account for drying and any required demolition, since moisture removal and material removal directly affect the schedule.
After that, rebuild timelines depend on factors such as structural repairs, material availability, inspections, and site conditions.
Damage Severity Matters
Because the extent of water intrusion directly affects drying time, material stability, and contamination risk, damage severity is one of the main factors that determines how long water damage repair takes.
When you have minor damage, repairs usually move faster because fewer assemblies, finishes, and contents are affected. As severity increases, you’re dealing with wider spread, deeper saturation, and greater risk to structural components.
You also need to evaluate water category, exposure duration, and how far moisture traveled beyond visible staining.
Clean supply-line leaks create a different repair timeline than stormwater or sewage backups. If framing, insulation, subfloors, or electrical areas are involved, safety protocols and repair scope expand.
A thorough assessment helps your team classify loss conditions accurately, protect occupants, and set realistic expectations you can trust together.
Drying And Demolition
Start with controlled drying and selective demolition, since these steps usually take the most time and have to be completed before reconstruction can begin. You’ll need moisture readings, containment, and airflow balanced to your material types, room layout, and contamination level.
Drying often runs several days, sometimes longer, because trapped moisture hides in framing, insulation, subfloors, and wall cavities. Your crew should place air movers and dehumidifiers strategically, monitor temperature and humidity, and adjust equipment as conditions change.
Demolition should stay selective: remove only unsalvageable drywall, flooring, trim, or insulation, while protecting stable materials. You also need dust control, PPE, and safe disposal procedures, especially if water was contaminated.
When these steps are thorough, you create a clean, dry, stable starting point your whole restoration team can trust.
Rebuild Timeline Factors
Although drying and demolition set the pace, rebuild time depends on how much material was removed, how deeply moisture migrated, and whether hidden damage appears once assemblies are opened.
You’ll move faster when framing, insulation, wiring, and subfloors test dry and pass documented inspection thresholds before enclosure resumes.
Your schedule also shifts with material lead times, permit requirements, specialty trades, and contamination controls.
If Category 2 or 3 water affected the area, you’ll need stricter cleaning, replacement, and verification steps before finishes return.
Structural repairs, HVAC cleaning, and mold remediation can extend sequencing because each task must clear safety checkpoints.
You’ll feel more confident when your team explains dependencies, moisture readings, and next milestones.
That shared plan helps you track progress, protect indoor conditions, and return your space to safe, reliable use sooner.
How Do You Choose the Right Repair Company?
How can you identify a repair company that will restore water-damaged property safely and correctly? Start by verifying licensing, insurance, and IICRC training. You should ask how they classify water, map moisture, and document drying goals. A reliable team explains containment, PPE, electrical lockout, and antimicrobial use without dodging questions.
Next, review response time, equipment capacity, and communication standards. You want technicians who inspect hidden cavities, monitor daily readings, and adjust airflow and dehumidification to meet psychrometric targets.
Ask for a written scope, photo records, and clear pricing before repairs begin. Check references for projects like yours, especially where wet materials, structural drying, and safe demolition mattered.
When a company follows standards and keeps you informed, you’ll feel supported by professionals who protect your property and your people.
Frequently Asked Questions
Will Homeowners Insurance Cover Water Damage Repair Costs?
Yes, your homeowners insurance may cover water damage repair costs if a sudden, accidental event caused them, but it usually won’t cover flooding or neglected leaks. You should document damage, review exclusions, and contact your insurer promptly.
Can Water Damage Cause Mold After Repairs Are Finished?
Yes, you can still get mold after repairs if technicians miss hidden moisture, skip drying verification, or rebuild too soon. You protect your home by confirming moisture readings, ventilation, and safe material replacement standards.
Is It Safe to Stay Home During Water Damage Repair?
Yes, you can sometimes stay home during water damage repair; for example, if crews isolate one dry room and air quality stays safe, you’ll remain safer elsewhere when contamination, structural risks, or electrical hazards affect occupied areas.
What Hidden Damage Can Leaks Cause Behind Walls?
Leaks can hide rot, mold, insulation saturation, warped framing, corroded wiring, and weakened drywall behind walls. You’ll want moisture mapping and targeted opening, so your home’s structure, air quality, and electrical safety stay protected.
How Can You Prevent Future Water Damage Problems?
You prevent future water damage by inspecting plumbing, sealing openings, maintaining drainage, and monitoring humidity—an ounce of prevention saves nine. You’ll protect your space and everyone in it by acting early, documenting risks, and scheduling routine checks.
Review
Water damage repair works best when you act fast, stop the source, assess moisture methodically, dry thoroughly, sanitize affected surfaces, and replace only what can’t be restored safely. You should treat every wet material as a potential structural and microbial risk until testing confirms otherwise. Within 24 to 48 hours, mold can begin growing on damp materials, which is why immediate response matters. If you choose a qualified repair company, you’ll protect both your structure and indoor air quality.