When water damage hits, you need to act fast: stop the source, assess the spread, and extract standing water before it soaks deeper into materials. Then you set up airflow and dehumidification to pull moisture out of walls, floors, and cavities while you track readings closely. Miss a step, and hidden dampness can turn into mold or structural decay. The drying process isn’t finished until the moisture data proves it.
Key Takeaways
- Stop the water source, document damage, and inspect all affected areas for visible and hidden moisture.
- Extract standing water immediately using pumps or wet vacuums, starting from the lowest area and moving outward.
- Set up air movers and dehumidifiers to increase airflow and lower humidity for controlled drying.
- Monitor moisture, temperature, and humidity regularly with meters to confirm drying progress and guide equipment placement.
- Remove trapped moisture from cavities and insulation, and avoid sealing damp materials or ending drying too early.
What Happens Right After Water Damage
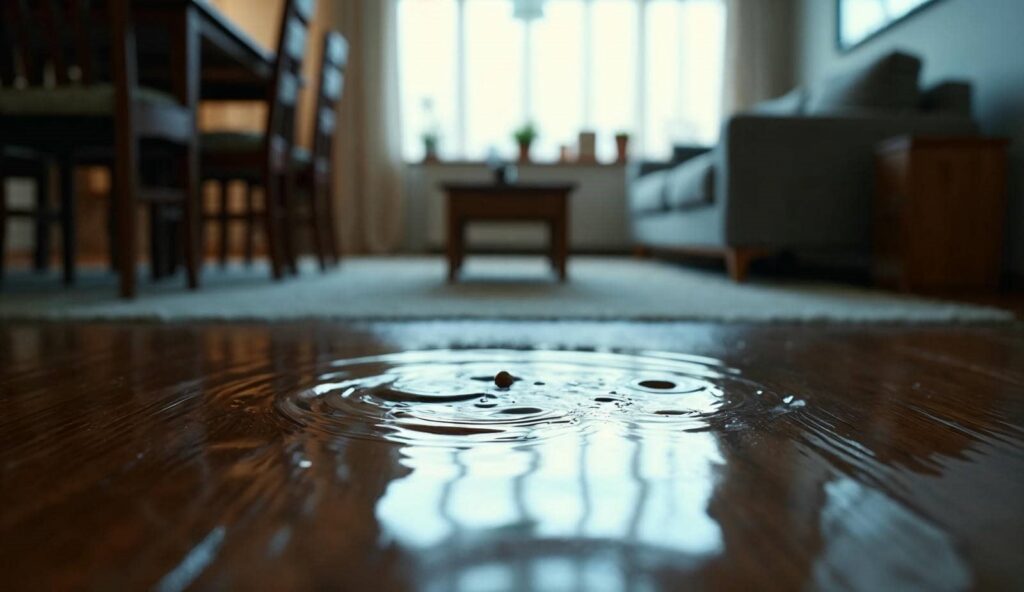
Right after water damage occurs, the drying process should begin with extraction to remove standing water as quickly as possible. You’ll reduce saturation in flooring, padding, and structural materials before moisture spreads deeper.
Next, you should set up airflow with high-velocity fans to move humid air away from affected surfaces. Dehumidifiers then pull moisture from the air, helping nearby materials release trapped water faster.
In the water damage drying process, you also need moisture checks with meters to confirm which areas still hold hidden dampness. That data helps you stay on track and avoid guesswork.
If you act quickly and follow each step in order, you’re not alone—you’re using a proven method that protects your space and supports a full recovery.
Stop the Water and Assess the Damage
First, you need to stop the water source to prevent further intrusion and structural damage.
Then you should inspect the affected areas to identify wet materials, active leaks, and safety hazards.
Document the full extent of the damage with photos and notes so you can plan extraction, airflow, dehumidification, and moisture checks accurately.
Stop Water Source
Before anything else, stop the water source and assess the damage so the drying process can begin safely and efficiently. If you can reach the shutoff valve, close it right away to halt active flow.
For a supply-line failure, turn off the nearest fixture valve or the main water service. If the source is a roof leak, broken appliance, or sewage backup, isolate the area and avoid contact until it’s controlled.
Cut power to any affected circuits if water is near outlets or equipment. Then confirm the source is fully stopped by watching for new flow, dripping, or pooling.
Acting fast protects your home, reduces cleanup time, and keeps your team on the same page. Once the source is secure, you’re ready to move into drying with confidence.
Inspect Affected Areas
With the water source secured, inspect the affected areas to confirm the extent of the damage and identify what needs drying.
Walk each room and check floors, baseboards, drywall, insulation, carpet, and furniture for visible saturation, swelling, staining, or warping.
Use a flashlight to look under cabinets, behind appliances, and inside closets where moisture often hides.
Feel surfaces for coolness or dampness, and note any sagging materials or trapped water pockets.
If you’re working with a team, assign one person to each zone so nothing gets missed.
Verify which areas need extraction, airflow, and dehumidification before you start equipment.
Keep your focus on safety, accurate observation, and the shared goal of getting the space back to normal quickly and efficiently.
Document Damage Extent
Damage mapping starts now, and you need a clear record of what the water reached. Photograph every affected room, wall, baseboard, floor, and cabinet before anything moves.
Mark the highest visible wet line, note the water source, and identify materials that soaked through. Record dates, times, meter readings, and any odors, swelling, or discoloration.
Use a simple sketch to show where extraction, airflow, and dehumidification will begin. Keep notes on hidden cavities, insulation, and subfloor areas, since moisture can linger there.
This documentation helps your team stay aligned, supports insurance claims, and guides moisture checks during drying. When you track the extent precisely, you reduce guesswork and make the next steps faster, safer, and more effective for everyone involved.
Water Damage Drying Process: Start With Extraction
Start extraction immediately to remove standing water before it spreads into structural materials.
Use pumps, wet vacuums, or other appropriate equipment to pull out as much water as possible, as fast as you can.
Rapid water removal lowers saturation levels and gives the drying process a workable starting point.
Rapid Water Removal
Quickly extract standing water to reduce spread and limit further absorption into flooring, drywall, and contents. You need to move fast because every minute increases wicking, swelling, and secondary damage.
Use the right water removal method for the material and depth of saturation, then keep checking affected zones so you can act before moisture migrates. Protect adjacent rooms by isolating the wet area and keeping foot traffic low.
If you’re part of a restoration crew, stay coordinated so everyone works the same drying plan. This first phase sets the pace for the rest of the water damage drying process, and it helps you regain control quickly.
When you remove water promptly, you reduce structural stress, support safer drying conditions, and keep the restoration effort on track.
Standing Water Extraction
Begin standing water extraction by selecting the right pump, wet vac, or extractor for the volume and surface type, then remove free water as soon as possible. You’ll protect floors, reduce absorption, and keep damage from spreading into cavities and underlayments.
Work from the lowest point toward the exit, and monitor hose placement so you don’t stir up debris or leave thin films behind. If carpet’s saturated, use weighted extraction passes and edge lifting to reach trapped water. On hard surfaces, squeegee toward the intake to improve efficiency.
Wear proper PPE, isolate electrical hazards, and document what you remove. When you finish, verify that no visible water remains before you move to airflow and dehumidification, because this step sets the pace for the entire drying plan.
Use Airflow to Speed Drying
Airflow is one of the fastest ways to speed up drying after water damage because it helps move moisture out of wet materials and into the surrounding air.
You should place fans so air sweeps across damp surfaces, not straight into corners where it stalls. Open interior doors, closet doors, and cabinet doors to let air reach hidden spaces.
Lift rugs, cushions, and furniture legs when possible so air can circulate underneath. Keep pathways clear so you and your crew can reposition equipment safely and quickly.
Aim airflow at wall bases, flooring edges, and other wet zones that dry slowly. When you set up the space well, you help the entire team work with confidence and keep the drying process moving.
Why Dehumidification Matters
Dehumidification pulls excess moisture from the air, which helps you dry materials faster and more completely.
It also limits conditions that can lead to swelling, corrosion, and mold growth in wet structures.
Moisture Removal Benefits
Removing moisture quickly helps stop damage from spreading through walls, floors, and materials. You lower indoor humidity so wet surfaces can release stored water faster, and your drying equipment works at peak efficiency.
Dehumidifiers pull vapor from the air, which creates a stronger moisture gradient and speeds evaporation from structural materials. That means your space reaches stable conditions sooner, with less lingering dampness in hidden cavities and porous finishes.
You also make moisture readings more reliable, so you can track progress and adjust airflow with confidence. When you keep humidity under control, you stay on the right path with your crew and protect the recovery timeline.
Clean, dry air supports consistent results, and that consistency helps your property return to normal.
Preventing Secondary Damage
When you control humidity early, you reduce the chance that hidden moisture will trigger secondary damage in framing, drywall, flooring, and finishes.
Dehumidifiers pull vapor out of the air, which lowers the vapor pressure around wet materials and helps them dry at a safe rate. Without that control, moisture can linger in cavities, swell wood, warp trim, and weaken adhesives.
You also cut the risk of mold growth, odors, and staining that can spread after the initial leak is gone.
In a well-run drying job, you pair dehumidification with airflow and moisture checks so you can verify progress, not guess. That approach helps your crew stay aligned, protects the structure, and gives you a cleaner path back to normal.
Dry Walls and Floors Properly
Once standing water is gone, you need to dry walls and floors with controlled airflow and dehumidification to pull moisture out of the materials.
Position air movers to sweep across surfaces, not directly into them, so evaporation stays even and efficient. Keep doors open when needed for circulation, and run dehumidifiers long enough to maintain a steady drying environment.
You should monitor temperature and humidity so conditions stay in the target range for the materials you’re drying. Check surface moisture with a meter and log readings at regular intervals.
If the floor or wall feels cool, damp, or shows rising readings, keep the equipment running. You’re not just drying a space; you’re restoring a safe, familiar place your household can trust again.
Remove Hidden Moisture in Cavities
Surface drying is only part of the job, because moisture can stay trapped inside wall cavities, under baseboards, and beneath flooring.
You need to open targeted access points so air can reach the hidden space without tearing out more material than necessary. Remove insulation that’s saturated, then direct low-profile airflow into cavities through injection holes or lifted trim.
Use cavity drying mats or vented baseboards where access is tight. Keep air moving from dry areas toward wet pockets so vapor leaves the assembly instead of spreading.
Seal bypasses that let humid air short-circuit the cavity. Work methodically, and you’ll help the structure dry from the inside out while keeping the room safe, clean, and ready for the rest of the team to finish strong together.
Check Moisture Levels as You Dry
As the structure dries, you should check moisture levels regularly with a moisture meter to confirm the affected materials are actually drying.
Take baseline readings in unaffected areas, then compare them to the wet zone so you can track progress with confidence.
Test the same spots each day, including walls, flooring, trim, and framing, because consistent data helps you adjust airflow and dehumidification without guesswork.
If readings stall, keep the equipment running and verify that hidden pockets aren’t slowing the process.
You’ll know you’re on the right track when numbers trend downward and remain stable across repeated checks.
Mistakes That Lead To Mold
If you rush the drying process, you can create the exact conditions mold needs to grow. You also invite trouble when you leave standing water in hidden cavities, skip airflow behind furniture, or shut off dehumidifiers too early.
Wet drywall, insulation, subflooring, and carpet padding can hold moisture long after the surface feels dry. If you seal damp materials into wall spaces, you trap humidity and raise the risk of microbial growth.
Don’t rely on smell alone; use moisture checks to verify each area is within target range. Keep fans and dehumidification running until readings stabilize.
When you follow each step carefully, you protect your space, support faster recovery, and stay in control with the rest of your crew.
When To Call A Water Damage Pro
Call a water damage pro when the affected area is large, the water has seeped into wall cavities or subflooring, or you can’t control moisture levels with extraction, airflow, and dehumidification.
You should also call for help if the water came from sewage, floodwater, or another contaminated source, because you need safer handling and strict sanitation.
If walls stay cool, floors feel swollen, or readings stay elevated after drying starts, a pro can locate hidden moisture and prevent structural decay.
Their equipment and training let you verify drying progress with meter checks, not guesswork.
That means you stay in control, protect your home, and reduce the chance of mold, warping, and costly repairs.
Frequently Asked Questions
What Should I Do With Wet Furniture During Drying?
You should move wet furniture to a dry, ventilated area, lift it off damp floors, and separate pieces to improve airflow. Wipe surfaces, remove cushions, and monitor moisture so you can prevent warping, staining, and mold.
How Long Does Carpet Usually Take to Dry?
Carpet usually takes 12 to 72 hours to dry, depending on saturation, airflow, humidity, and padding. You’ll speed it up with extraction, fans, and dehumidifiers, then verify dryness with moisture checks.
Can I Stay in My Home During the Drying Process?
Yes, you can often stay home if drying is contained. You’ll need good airflow, dehumidifiers, and moisture checks. If contamination or structural damage exists, you shouldn’t.
Should I Turn off the HVAC System After Water Damage?
You should turn off your HVAC system until a technician inspects it, because it can spread moisture, contamination, and odors. You’ll protect your home’s drying plan, improve airflow control, and support faster moisture removal.
How Can I Tell if Insulation Is Still Wet?
You can tell insulation’s still wet if it feels heavy, clumps like a soggy sponge, or reads high on a moisture meter. You’ll need airflow, dehumidification, and repeated checks to confirm it’s drying.
Review
You’ve now got the water damage drying process from start to finish: stop the source, extract standing water, move air, dehumidify, and track moisture until materials reach safe levels. Don’t rush, and don’t trap dampness inside walls or flooring, or mold can spread like a silent leak. If hidden moisture remains or damage is extensive, call a water damage pro. Fast, controlled drying protects your structure and helps you restore it correctly.