A sewage backup can turn your property into a contamination zone in minutes. You need to act fast to protect health, limit damage, and meet cleanup standards. Start with proper PPE, isolate the area, and remove standing sewage and unsalvageable materials. Then disinfect, dry, and document every step to support safe recovery. What you miss now can become a compliance issue later.
Key Takeaways
- Treat the area as contaminated, restrict access, and wear impermeable gloves, boots, eye protection, and respiratory protection.
- Remove standing sewage and discard soaked porous materials that cannot be thoroughly cleaned or disinfected.
- Clean hard surfaces, then apply EPA-registered disinfectants and document all affected areas and disposal actions.
- Dry walls, floors, and hidden spaces with dehumidifiers and air movers to prevent mold growth and further damage.
- Have licensed professionals inspect electrical, structural, and plumbing systems before reoccupying the property.
What a Sewage Backup Does to Your Property
A sewage backup quickly contaminates floors, walls, fixtures, and contents with wastewater, bacteria, and other hazardous materials. You’ll see porous materials absorb contaminants, while hard surfaces retain biofilm and residue.
Your HVAC pathways, baseboards, and lower cabinetry can also spread contamination beyond the original source. In affected rooms, sewage cleanup must address visible waste, hidden moisture, and degraded materials that no longer meet sanitary conditions.
You may notice staining, odor, and surface film, all of which indicate regulatory cleanup needs. Belonging to a safe, healthy property starts with recognizing that this event changes how you use the space.
Your restoration scope should document impacted areas, classify materials, and support compliant removal, cleaning, and disinfection so you can return to normal occupancy with confidence.
Why Immediate Sewage Cleanup Matters
When sewage remains in place, contamination spreads fast through porous materials, seams, and concealed cavities, increasing health risk and expanding the scope of regulated cleanup. You need immediate action because delays let bacteria, viruses, and moisture migrate deeper, raising demolition and disposal costs.
You limit saturation of drywall, trim, and subflooring.
You reduce odor absorption and aerosolized residue.
You preserve more building materials for remediation.
You shorten drying, cleaning, and verification timelines.
You support compliance with sanitation and waste rules.
Acting quickly helps your property’s recovery stay controlled, documented, and aligned with professional standards.
When you respond without waiting, you protect the people who belong there and keep the cleanup effort focused, efficient, and measurable.
Stay Safe Before Cleanup Starts
Before you enter a sewage-affected area, stop and control the hazards. You need to treat the space as contaminated until you verify it’s safe.
Wear impermeable gloves, waterproof boots, eye protection, and a fitted respirator if aerosols or odors are present. De-energize affected circuits from a dry location and lock out power when possible.
Open windows and doors only if doing so won’t spread contaminants or create unsafe airflow. Keep children, pets, and nonessential workers out of the zone, and post a clear warning at access points.
Report gas leaks, structural damage, or sewage exposure to the proper utility or emergency contact.
When you follow these controls, you protect your team, support compliance, and keep recovery moving in the right direction.
Remove Standing Sewage and Contaminated Items
You should pump out standing sewage promptly with appropriate extraction equipment to reduce contamination and limit further damage.
Remove all soaked materials that can’t be effectively cleaned and disinfected, including porous items that retain sewage.
Dispose of contaminated items in accordance with local health and waste regulations to prevent cross-contamination and restore the space safely.
Pump Out Standing Sewage
Pump out standing sewage as soon as conditions allow to limit spread, reduce saturation, and support safe recovery.
You should treat the area as a regulated hazard zone and use approved pumping equipment, containment, and PPE. Keep access controlled, and verify that electrical sources stay isolated before you begin.
Work methodically so you don’t push contamination farther into the structure.
- Establish a safe perimeter
- Wear gloves, boots, and eye protection
- Remove liquids with a rated pump
- Collect residues in approved containers
- Document conditions for compliance
You’re protecting your property and your team when you follow these steps.
After pumping, inspect surfaces for remaining contamination, then move to the next cleanup phase with confidence and care.
Remove Soaked Materials
Remove soaked materials immediately after sewage extraction to prevent wicking, microbial growth, and further structural damage.
You should enter the affected area only after you’ve confirmed PPE requirements and utility isolation. Pull up carpet, padding, baseboards, insulation, drywall, and any porous furnishings that contacted sewage or contaminated moisture.
Work from the cleanest edge toward the most affected area to limit spread. Bag or wrap removed items in leak-resistant material while keeping pathways controlled and documented.
Use hand tools that you can disinfect afterward, and avoid compressing saturated materials, which can drive contamination into subfloors and wall cavities.
If you’re part of a coordinated remediation team, follow site protocols for moisture mapping, source segregation, and containment so your crew stays aligned and the property recovery process remains compliant.
Dispose Contaminated Items
After sewage extraction, dispose of standing wastewater and contaminated debris without delay to reduce exposure, odor migration, and secondary damage.
You should treat all affected items as regulated waste until you verify they’re safe for reuse. Bag, label, and segregate materials to keep clean areas protected and your crew aligned.
- Pump residual liquid into approved containers.
- Remove porous items that can’t be sanitized.
- Seal contaminated debris for licensed disposal.
- Disinfect nonporous surfaces before handling.
- Document each load for compliance records.
You’ll reduce cross-contamination when you follow local disposal rules and use PPE throughout handling.
Keep children, pets, and occupants out until the area’s cleared. By acting methodically, you protect your property, support your recovery team, and restore a safe, code-aware environment.
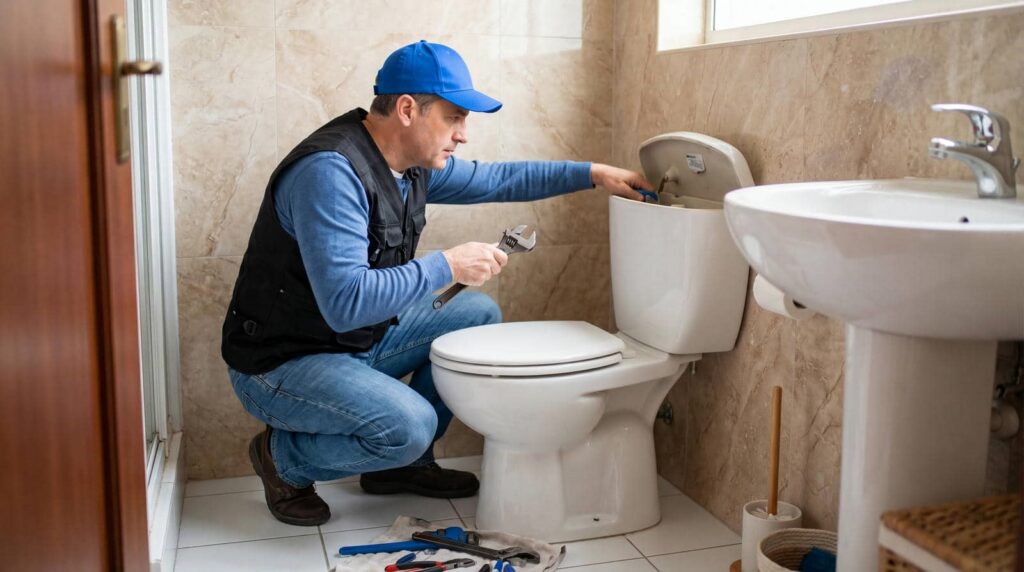
Disinfect Surfaces After Sewage Cleanup
Disinfect all affected surfaces with an EPA-registered disinfectant approved for sewage contamination, following the product label for concentration, contact time, and application method.
You should clean visible residue first, because organic matter can reduce disinfectant performance.
Apply the solution to hard, nonporous surfaces that remained in contact with sewage, including counters, fixtures, and tools, and keep the surface wet for the full dwell time.
Use gloves, eye protection, and ventilation consistent with the label and your site controls. You’ll protect your household, team, and visitors by avoiding splash, cross-contamination, and incomplete coverage.
After disinfection, rinse only when the product instructions require it.
Document the product name, batch, dilution, and time applied so you can verify compliance and support a safe, organized recovery.
Dry Out Walls, Floors, and Hidden Moisture
Once disinfection is complete, you should begin structural drying immediately to limit microbial growth and prevent hidden moisture from spreading into framing, insulation, subfloors, and wall cavities.
You’ll help protect the building’s serviceable condition by using controlled airflow, dehumidification, and continuous moisture monitoring. Work methodically so each surface reaches acceptable dryness.
- Remove standing water
- Run dehumidifiers and air movers
- Open access points for circulation
- Measure moisture in materials
- Keep humidity within target limits
You should document readings to show compliance with restoration standards and to confirm progress.
If temperatures drop or odors return, keep drying active. By staying disciplined, you’re doing the right thing for your property and for everyone who depends on a clean, stable indoor environment.
Find Damage That Needs Professional Repair
As drying progresses, inspect the affected structure for damage that needs licensed repair before returning the property to service.
You should document any warped framing, delaminated subflooring, cracked drywall, or compromised insulation, and you’ll want to verify that load-bearing members remain sound.
If you see soft joists, sagging ceilings, or separated seams, stop and arrange qualified evaluation.
Electrical devices, outlets, switches, and wiring exposed to sewage require licensed testing or replacement per code.
Plumbing failures, damaged vents, and failed seals also need correction before reoccupancy.
Keep photos, measurements, and repair notes so your team can track what’s been restored and what still needs attention.
Prevent Mold After a Sewage Backup
You must act quickly after a sewage backup to reduce mold growth and limit secondary damage.
Dry all affected areas with controlled ventilation and dehumidification, and verify that moisture levels return to safe thresholds.
Remove contaminated porous materials that can’t be properly sanitized, since they can retain moisture and support microbial growth.
Act Quickly
Act quickly after a sewage backup to limit moisture intrusion and reduce the risk of mold growth. You need to treat the event as an exposure control issue, not a routine spill. Your prompt response helps protect occupants, preserve materials, and support compliant cleanup.
- Isolate the affected area.
- Notify qualified responders.
- Remove wet, porous contents.
- Document visible contamination.
- Start remediation without delay.
You’ll reduce the chance that microbes spread through adjacent spaces and HVAC pathways.
If you act as part of a prepared team, you’re more likely to restore safe conditions and stay aligned with health guidance. Fast action isn’t optional; it’s the first control measure that keeps your property recovery on track and helps everyone feel confident moving forward together.
Dry Affected Areas
Once the source is controlled and contaminated contents are removed, dry all affected surfaces and concealed cavities as fast as possible to limit microbial growth.
You should deploy dehumidifiers, air movers, and, where approved, localized heat to reduce moisture below conditions that support mold.
Monitor humidity, surface temperature, and material moisture with calibrated instruments, and document readings at regular intervals.
Open wall voids, base cabinets, and other hidden spaces only as needed to verify drying progress and maintain airflow.
Keep the work area isolated from clean zones to avoid cross-contamination.
You’re protecting your home and your people by restoring acceptable indoor conditions promptly.
Continue drying until materials meet dry standards and no damp odor or visible condensation remains.
Remove Contaminated Materials
Remove porous and non-salvageable materials that have been saturated by sewage, including insulation, drywall, carpet, carpet pad, and contaminated textiles, because retained contamination can support mold growth and persistent odors.
You should bag, seal, and remove debris promptly to limit exposure and protect your team.
- Wear gloves, eye protection, and respiratory protection.
- Cut back materials beyond the visible wet zone.
- Separate salvageable items from waste immediately.
- Place waste in heavy-duty, closed containers.
- Dispose of materials per local regulations.
You’re reducing microbial risk when you remove contaminated contents before cleanup proceeds.
Inspect wall cavities, subfloors, and framing for hidden damage, then document disposal for insurance and compliance.
When you follow this method, you support a safer, healthier return to your property and help your household feel confident again.
Prevent Another Sewage Backup
After the cleanup, you should inspect the sewer line, interior drains, and connected plumbing to identify the failure point and correct it before service resumes.
You should then schedule a licensed plumber to test the system, verify slope, clear obstructions, and confirm backflow protection.
If your property uses a sump, grease interceptor, or lift station, you need documented maintenance and manufacturer-compliant service intervals.
Keep floor drains sealed, avoid flushing wipes or grease, and install cleanouts where code allows.
You should also monitor heavy-rain inflow, root intrusion, and damaged lateral lines, because these conditions often trigger repeat backups.
By keeping records, following local plumbing code, and acting quickly on warning signs, you protect your facility, your neighbors, and your team.
This keeps everyone aligned and ready.
Frequently Asked Questions
How Long Does Sewage Cleanup Usually Take?
Usually, you’ll need 1 to 5 days, depending on contamination level, affected materials, drying time, and required disinfection. You should act immediately, because delays increase health risks, structural damage, and restoration costs.
Can Sewage Damage Spread Through the HVAC System?
Yes—like a hidden river, sewage can travel through your HVAC system, spreading contaminants. You should shut it down, isolate affected areas, and get licensed remediation fast; you’ll protect indoor air quality and keep your property compliant.
Will My Insurance Cover Sewage Backup Cleanup Costs?
Usually, your insurance may cover sewage backup cleanup costs if you’ve added sewer or water backup coverage; you should review your policy, report the loss promptly, and document damage to support your claim.
Should I Replace Carpets After a Sewage Backup?
You should replace carpets after a sewage backup if contamination reached padding or backing; porous fibers often retain pathogens. If an adjuster or remediation professional deems salvageable, you can clean, disinfect, and dry them thoroughly.
When Is It Safe to Re-Enter the Property?
You can re-enter only after professionals declare the area dry, disinfected, and structurally safe; until then, don’t cross that threshold. You belong safest when air tests, moisture readings, and clearance checks meet requirements.
Final Thoughts
In conclusion, you need to treat sewage cleanup as a regulated recovery process, not just a surface cleaning. If you wear PPE, remove contaminated materials, disinfect correctly, and dry hidden moisture, you reduce health risk and structural loss. For example, if a basement backup reaches drywall, you should discard the affected lower sections instead of only wiping them down. When you document each step and inspect plumbing regularly, you’ll lower the chance of recurrence.