What you may not know is that floor water damage often extends below the visible warp, where trapped moisture can weaken adhesives, subfloor layers, and fasteners. Floor Water Damage Repair should begin by identifying the water source, verifying moisture levels, and checking for swelling or microbial growth. Some materials can recover if drying starts early, while others must be removed, and the difference isn’t always obvious at first glance.
Key Takeaways
- Identify water damage signs such as cupping, soft spots, stains, lifted seams, warped edges, and musty odors before repairs begin.
- Stop the water source immediately, remove standing moisture, and dry the area with fans, dehumidifiers, and ventilation.
- Use a moisture meter and inspect trim, walls, and subfloors to assess severity and detect hidden water migration.
- Repair flooring only after moisture levels drop and the subfloor remains sound; replace materials with swelling, broken bonds, or contamination.
- Prevent future damage by inspecting plumbing, controlling indoor humidity, and maintaining drainage, gutters, and grading around the home.
Spot Signs of Floor Water Damage
How can you tell when floor water damage is developing before structural failure spreads? You start with routine observation and trust what your space is showing you. Check for cupping, crowning, soft spots, lifted seams, and unexplained slope changes.
Look for discoloration, recurring stains, peeling finish, or white mineral residue near joints and baseboards.
Next, use your senses methodically. Notice musty odors, increased indoor humidity, or a hollow sound underfoot. Pay attention if boards flex, tile grout cracks, or laminate edges swell.
These indicators often point to wet subfloors or long-term moisture intrusion. For safety, document each symptom by room and severity so your household stays aligned on risk.
Early recognition supports timely floor water damage repair and helps protect the structure everyone depends on daily together.
Stop the Leak and Dry the Floor
First, you need to locate and stop the water source so the damage doesn’t continue and the area is safe to inspect.
Next, remove standing moisture with absorbent materials or extraction equipment to limit subfloor saturation and surface warping.
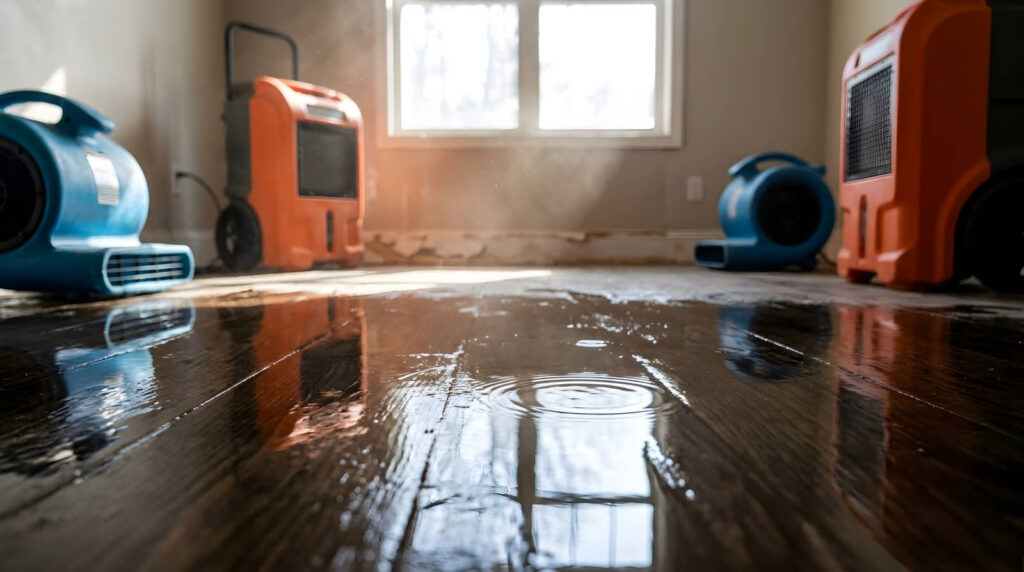
Then, you should accelerate drying with fans, dehumidifiers, and ventilation so you can reduce residual moisture and prepare the floor for repair.
Find The Water Source
Before you repair floor water damage, you need to locate the exact source of the moisture, stop the leak, and dry the affected area to prevent further damage to the subfloor and surface material.
Start by tracing water patterns, discoloration, swelling, or soft spots to their highest or most concentrated point. Check appliance supply lines, drain connections, toilet seals, sink traps, exterior doors, windows, and nearby plumbing walls.
If the area sits below a bathroom or laundry room, inspect overhead fixtures and penetrations. Use a moisture meter to compare suspect sections with dry flooring, and document readings so your team can confirm progress.
Shut off the nearest water supply valve when you identify an active leak. If electricity may contact moisture, cut power at the breaker first and follow your facility or household safety plan.
Remove Standing Moisture
Once you’ve stopped the source of the leak, remove standing water immediately so it can’t continue soaking the finish layer, seams, and subfloor.
Put on slip-resistant footwear and shut off power to any affected circuits before stepping into wet areas. Use towels, a mop, or a wet vacuum to extract pooled water from the surface.
Work from the perimeter toward the center so you don’t push moisture deeper into joints or under planks.
Lift area rugs, mats, and movable furniture so trapped water can’t migrate back onto the floor. If water has reached thresholds or edges, blot those points carefully and inspect for seepage below.
Bag saturated disposable materials promptly. By handling removal in a disciplined way, you protect the assembly and follow the same careful standards trusted by experienced homeowners everywhere.
Speed Up Drying
Because trapped moisture keeps migrating after surface water is gone, you should accelerate drying right away with controlled airflow and dehumidification.
Position air movers to sweep across the floor, not directly down, so evaporation increases without forcing water deeper into seams. Run a dehumidifier continuously, empty it safely, and monitor humidity and temperature for stable drying conditions.
Open access points where appropriate, including baseboards or underlayment edges, so hidden moisture can escape. If electricity was affected, keep power off until a qualified electrician clears the area.
Use a moisture meter to track progress in the subfloor and surrounding materials, not just the visible surface. As you work, you’re following the same disciplined process restoration professionals use, and that helps protect your floor, your home, and everyone in it.
Decide If Floor Repair Is Possible
Next, you’ll assess the floor’s damage severity by checking for swelling, warping, soft spots, and subfloor instability.
If the material remains structurally sound, you can restore it with targeted repairs and controlled drying.
If you find widespread deterioration, contamination, or loss of integrity, you’ll need to replace the affected sections to maintain safety.
Assess Damage Severity
How severe is the water damage, and can the floor still be repaired? You need a systematic inspection before making that call. Start by shutting off power to nearby circuits and wearing gloves, eye protection, and a respirator if odors or visible growth are present.
Then map the wet area, check moisture spread, and note whether the flooring has cupped, buckled, softened, or separated at seams.
- Measure moisture in the surface and subfloor with a meter.
- Press suspect areas to identify spongy spots or structural weakening.
- Inspect edges, trim, and adjacent walls for hidden migration.
- Document stains, odors, corrosion, and contamination sources.
When you assess carefully, you protect your household and support sound decisions.
You’re part of a community that values safe, informed repair steps and durable flooring outcomes together.
Replace Or Restore
Once you’ve mapped moisture, checked deformation, and noted contamination, you can decide whether the floor should be restored or replaced.
Restore materials when moisture readings are declining, the subfloor remains structurally sound, and warping is minor enough for drying, fastening, or refinishing to correct.
Replace materials when swelling has broken bonds, boards have cupped or buckled beyond tolerance, fasteners have loosened, or microbial growth affects porous layers.
You should also match the decision to the flooring type. Hardwood may tolerate controlled drying and sanding, while laminate, engineered cores, and saturated particleboard usually require removal.
If gray or black water reached the assembly, prioritize replacement to protect your household.
Check Whether the Subfloor Can Stay
Before you rebuild the floor, determine whether the subfloor is still structurally sound. You need objective checks, not guesswork. Shut off power to affected circuits, wear PPE, and verify the area is dry enough for inspection.
Probe wood panels with an awl and watch for crumbling fibers, delamination, or persistent softness. For concrete, look for spalling, major cracking, or moisture pushing through the surface.
- Measure moisture content and compare readings across affected and unaffected sections.
- Check fastener grip, panel edges, and seams for swelling or separation.
- Sight across the floor for dips, ridges, or movement under body weight.
- Inspect below for stained joists, mold growth, and corrosion at connectors.
If the substrate stays firm, flat, and dry to specification, you can move forward confidently together.
Repair or Replace Damaged Flooring
With the subfloor confirmed sound, you can address the finish flooring by matching the repair method to the material and the extent of water exposure.
Inspect each section systematically. Replace laminate, engineered boards, or carpet padding that swelled, delaminated, or held contamination.
Refinish solid hardwood only when cupping is minor and moisture readings have stabilized. Reset loose tile if the mortar bond failed, but replace cracked tile and compromised grout.
Work in controlled sections, and wear gloves, eye protection, and a respirator when dust or microbial residue is present.
Remove baseboards carefully so you can access edges without damaging adjacent surfaces. Salvage only materials that remain structurally intact, cleanable, and dimensionally stable.
Prevent Future Floor Water Damage
Because recurring moisture often starts at predictable failure points, you can prevent future floor water damage by controlling water at the source, verifying drainage paths, and monitoring indoor humidity.
- Inspect supply lines, appliance hoses, and shutoff valves; replace cracked components before they seep.
- Keep gutters, downspouts, and grading moving water away so it can’t migrate under floors.
- Maintain indoor relative humidity between 30 and 60 percent with ventilation, exhaust fans, or dehumidifiers.
- Seal penetrations at tubs, toilets, door thresholds, and slab joints using compatible waterproof materials.
You protect your home best by following a repeatable inspection schedule and documenting changes.
Wear gloves when checking suspect areas, and disconnect power near wet surfaces.
When you stay consistent, your flooring system stays drier, safer, and stronger for everyone under your roof.
Frequently Asked Questions
Will Homeowners Insurance Cover Floor Water Damage Repairs?
Yes, your homeowners insurance may cover floor water damage repairs if a sudden, accidental event caused them; it usually won’t cover gradual leaks or neglect. You should document damage, review exclusions, and contact your insurer promptly.
How Long Does Floor Water Damage Repair Usually Take?
You can expect floor water damage repair to take two days to several weeks—like a clock testing patience. You’ll need inspection, drying, material replacement, and moisture verification to keep your home safe and sound.
Can Water-Damaged Floors Cause Mold-Related Health Problems?
Yes, water-damaged floors can trigger mold-related health problems if you don’t dry and remediate them quickly. You may experience allergies, asthma flare-ups, or irritation. Protect your household by controlling moisture, removing damaged materials, and verifying dryness.
How Much Does Professional Floor Water Damage Repair Cost?
Professional repair prices typically range from $500 to $5,000; severe structural saturation can push costs higher. You’ll pay based on moisture mapping, material removal, drying equipment, and safe restoration steps that protect your shared space.
Should I Hire a Contractor or Repair Water-Damaged Floors Myself?
You should hire a contractor if damage involves subfloors, structural movement, or possible contamination; handle it yourself only for minor, dry, accessible areas. You’ll protect your home better by following proven, safety-first practices professionals use.
Recap
When you tackle floor water damage, you’re reading the structure like a weathered map: follow the moisture, stop the source, and test every layer before you commit to repair. If the flooring or subfloor has lost strength, replace it rather than gamble with hidden failure. Drying, verification, and material matching aren’t shortcuts—they’re your guardrails. With a methodical, safety-first approach, you can turn warped, waterlogged surfaces into stable footing that holds fast under pressure.