
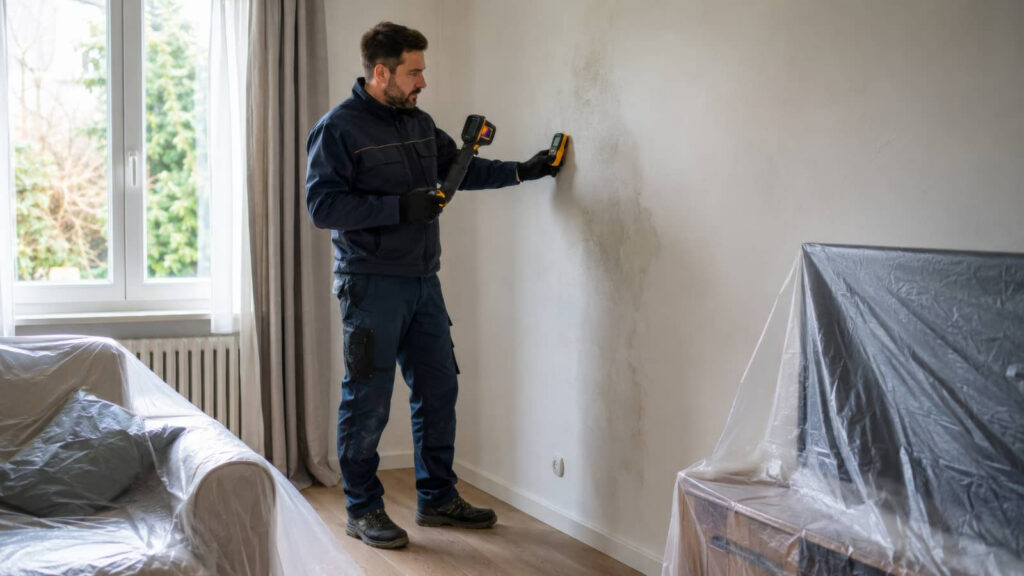
Water mitigation after ceiling leak damage starts with finding where the moisture has traveled.
When water stains bloom on your ceiling, they signal a hidden path of damage you can’t ignore. You need to stop the leak, map moisture beyond the visible spot, and remove any saturated drywall or insulation before mold takes hold. Then inspect for sagging, dry the cavity thoroughly, and sanitize the area. The real risk often sits behind the stain, where the next failure starts.
Key Takeaways: Water Mitigation After Ceiling Leak
- Stop the leak immediately by shutting off water, protecting belongings, and documenting damage with photos.
- Check for hidden moisture with a meter, inspecting seams, fixtures, vents, trim, walls, and floors.
- Remove wet drywall, insulation, and other porous materials to prevent trapped moisture and mold growth.
- Dry the area thoroughly using dehumidifiers, air movers, ventilation, and regular moisture monitoring.
- Repair structural damage and prevent future leaks with inspections, plumbing maintenance, and proper drainage.
Stop the Ceiling Leak Fast
Act quickly to stop the ceiling leak at the source, because every minute of continued water intrusion can spread damage to insulation, drywall, framing, and finishes.
You should shut off the supply line, if you can do so safely, or isolate the affected fixture right away.
Then place a container under active drips and protect nearby belongings with plastic sheeting or towels.
Document the leak with photos, then contact your building manager, plumber, or insurer without delay.
In water mitigation after ceiling leak cases, your team needs fast source control to limit deterioration and keep repair scope manageable.
Stay calm, follow the same sequence each time, and you’ll help everyone work efficiently toward a dry, stable space that feels secure again.
Find Hidden Moisture Behind the Ceiling
How do you know the ceiling is truly dry? You inspect beyond the visible stain. Use a moisture meter on drywall, joists, and insulation edges, comparing readings to nearby dry areas.
Check around seams, light fixtures, vents, and trim, where water often migrates. Look for cool spots, slight sagging, discoloration, or a soft surface, then mark each location for follow-up.
If you have access above the ceiling, scan the cavity methodically and note damp framing or trapped humidity. Run a fan only after you’ve mapped wet zones so you can track changes accurately.
In a careful crew, everyone documents readings, dates, and locations the same way. That shared record helps you confirm hidden moisture is fading, not shifting, and keeps your team aligned.
Remove Wet Materials Before Mold Spreads
You should remove saturated drywall as soon as it no longer dries uniformly, since trapped moisture can support mold growth.
Dispose of damaged insulation and any porous ceiling materials that can’t be fully dried or sanitized.
Extract wet ceiling components completely so you can limit contamination and prepare the area for drying and repair.
Remove Saturated Drywall
Carefully remove saturated drywall as soon as possible to limit hidden moisture and stop mold from developing in the ceiling cavity.
You should mark the affected area, cut back to sound material, and keep cuts clean and controlled.
Wear gloves, eye protection, and a respirator if dust or growth is present.
As you open the section, inspect the framing and the back side of the drywall for discoloration, swelling, or soft spots.
Use a utility knife or drywall saw to separate damaged panels without disturbing adjacent surfaces.
Work methodically so you can identify the full wet boundary.
If you’re part of a coordinated mitigation effort, document what you remove and keep the work zone organized.
Quick, disciplined removal helps your team regain control and protects the structure from further deterioration.
Dispose Damaged Insulation
Discard any insulation that got wet during the ceiling leak, since saturated batts or blown-in material can hold moisture and accelerate mold growth inside the cavity.
You should bag it promptly, seal the bags, and move them out of the work area to keep fibers and spores from spreading.
If the insulation is compressed, stained, or has a damp odor, treat it as unsalvageable.
Wear gloves, a respirator, and eye protection while you work, and keep the cavity open for inspection.
Check adjacent framing for hidden dampness before you install anything new.
Your team will work faster and safer when you remove compromised insulation methodically, label waste clearly, and keep the space organized.
Clean disposal helps your repair stay dry, stable, and ready for replacement.
Extract Wet Ceiling Materials
Once the insulation is out, remove any ceiling material that’s soaked, sagging, stained, or delaminated, because wet drywall, plaster, and finish layers can trap moisture and let mold establish quickly inside the assembly.
You should cut back to sound, dry edges, then take down every compromised section with controlled, deliberate cuts. Use a utility knife, jab saw, or oscillating tool to avoid unnecessary vibration and spread of debris.
Keep the work area contained, and bag waste as you go so you’re not tracking contamination through your space.
If you expose framing, inspect for darkening, soft fibers, or persistent dampness. You’re protecting the whole system now, and each clean removal helps your home dry faster and recover with less hidden damage.
Inspect for Sagging and Structural Damage
After a ceiling leak, you should inspect the area for sagging, cracking, or separation that can signal structural damage.
Use a stable ladder and look along joints, seams, and fasteners for deflection, bowing, or gaps. Press gently with one hand only if the surface feels firm; don’t force weak material.
Check nearby walls for new cracks, shifted trim, or misaligned doors that may indicate load transfer. If you notice visible displacement, mark the boundaries and document them for your crew or contractor.
You’re protecting the space by confirming whether framing, drywall, or plaster has lost integrity. Treat any change in level or shape as a warning, not a cosmetic issue.
When the structure stays intact, you can move forward with confidence and stay aligned with the rest of the team.
Dry Out Ceiling and Wall Cavities
Open the ceiling and wall cavities to release trapped moisture and speed evaporation before hidden dampness can spread.
You then remove damp insulation, if present, and create access points that let air move through the framing.
Position air movers to push airflow across studs, joists, and sheathing, and run dehumidifiers to pull water vapor from the enclosed space.
You monitor moisture with a meter at regular intervals, checking wood, drywall edges, and cavity air until readings trend to normal.
Keep exterior openings closed so you don’t add new humidity.
If you work methodically, you protect the structure and help your team stay confident in the process.
Continue drying until materials reach stable, acceptable levels, then prepare the area for the next restoration step.
Clean Up Odors and Sanitize the Area
As moisture levels drop, you remove lingering odors and sanitize the affected surfaces to limit microbial growth and restore safe conditions.
You work methodically, wiping hard surfaces with approved cleaners and treating porous materials only as directed. For a team-minded, safe space, you keep airflow controlled and verify that residues don’t remain.
- Damp drywall edges, cleaned and deodorized.
- Baseboards, wiped until no film stays.
- Ceiling joist faces, sanitized with focused passes.
- Nearby furnishings, assessed, cleaned, and set aside.
You then inspect for sour, musty, or metallic notes that signal trapped contamination.
If odors persist, you repeat targeted cleaning until the area smells neutral and feels dry, helping everyone reenter with confidence and comfort.
Prevent Future Ceiling Leaks
To prevent future ceiling leaks, you inspect the roof, plumbing, and attic framing for the exact failure point and correct it before restoration closes up the area. You then document the source, because you want your repair to hold under real weather and daily use.
Seal failed flashing, replace cracked supply lines, tighten loose fittings, and confirm drainage moves away from the structure.
In the attic, check insulation gaps, damaged sheathing, and condensation patterns so hidden moisture doesn’t return.
After repairs, you test all affected systems and monitor the repaired zone during the next rain. You also keep gutters clear and schedule routine inspections.
That method helps you protect your home, stay ahead of damage, and feel confident your space belongs to you again.
Frequently Asked Questions
How Long Does Ceiling Water Damage Usually Take to Appear?
You’ll usually notice ceiling water damage within minutes to hours, though hidden leaks can take days or weeks to show stains, sagging, or mold. You should inspect promptly and dry materials fast.
Can I Stay in the Room During Water Mitigation?
Usually, you shouldn’t stay in the room during mitigation; it’s a workshop in motion. You’ll avoid dust, noise, and equipment risks, and you’ll help the team dry hidden moisture faster and more safely.
Does Homeowners Insurance Cover Hidden Moisture Damage?
Usually, your homeowners insurance covers hidden moisture damage if a covered leak caused it, but you’ll need prompt reporting, documentation, and mitigation. You should review exclusions, because slow leaks and neglect often aren’t covered.
How Do I Know if Insulation Was Affected?
You’ll know insulation was affected if you see staining, sagging, clumping, or musty odor, and moisture readings stay elevated. You should remove a sample or inspect the cavity with a meter or camera.
When Should I Call a Professional Water Mitigation Company?
Call a professional immediately if moisture’s spreading, materials stayed wet over 24 hours, or you spot mold; 60% of hidden water damage worsens within days, and you’ll protect your home and community faster.
Effective water mitigation after ceiling leak damage always includes moisture mapping above and around the stain. Skipping water mitigation after ceiling leak events often leads to sagging drywall and hidden mold. Professional water mitigation after ceiling leak damage also protects insulation, framing, and wiring. The sooner water mitigation after ceiling leak problems begins, the smaller the repair. Ask your contractor to document every step of water mitigation after ceiling leak damage for your insurance claim.
Final Thoughts
Act fast and stay methodical after a ceiling leak. Shut off the source, trace hidden moisture, and remove saturated drywall before mold takes hold. Inspect for sagging, dry wall cavities thoroughly, and sanitize affected surfaces to control odor and contamination. An ounce of prevention is worth a pound of cure, so keep up with routine inspections and maintenance. If you do, you’ll protect your home’s structure, indoor air quality, and long-term value.
Prompt water mitigation after ceiling leak problems keeps hidden moisture from turning into mold and structural damage. Need help now? Contact our emergency response team.