Water can turn your home into a ticking clock, and every minute counts. You’ll need to stop the source, document the damage, and call a restoration team that can inspect, extract, and dry the affected areas fast. With the right equipment and process, you can reduce structural loss, protect belongings, and limit mold growth, but the next step is where the real difference starts…
Key Takeaways
- Stop the water source immediately, if safe, and call a water damage restoration team right away.
- Document visible damage with photos and keep people out of wet areas to reduce safety risks.
- Restoration professionals remove standing water, dry materials with air movers and dehumidifiers, and monitor moisture levels.
- Fast action limits structural damage, mold growth, odors, and hidden moisture behind walls or under floors.
- Choose a licensed, insured company offering 24/7 response, clear pricing, moisture mapping, and insurance claim support.
What Is Water Damage Restoration?
Water damage restoration is the step-by-step process of removing water, drying affected areas, cleaning contaminated materials, and repairing damage to bring your home back to a safe condition.
You use water damage restoration to control moisture, limit structural deterioration, and reduce mold risk.
First, professionals assess the source and extent of the damage, then they extract standing water and set up drying equipment.
Next, they clean, sanitize, and remove materials that can’t be restored.
Finally, they repair finishes and verify that moisture levels have returned to normal.
When you understand this process, you can feel more confident and supported, because you’re not facing the loss alone.
Water damage restoration gives your home a clear path back to stability.
What Should You Do First After Water Damage?
First, stop the water source if you can do it safely by closing the main valve or shutting off the affected fixture.
Then call a water damage restoration team right away so they can assess the damage and start drying and cleanup.
Fast action helps limit structural damage, mold growth, and repair costs.
Stop The Water Source
If it’s safe to do so, shut off the water source right away to limit further damage.
Find the nearest valve, fixture shutoff, or main supply line and turn it clockwise until it stops. If the leak comes from a toilet, sink, appliance, or pipe connection, isolate that fixture first.
For a burst line or unknown source, use the main shutoff to stop incoming water to the whole home. Then check for active dripping, pooling, or spraying and confirm the flow has stopped.
Keep your footing secure and avoid electrical hazards while you work.
Once the water is off, you can focus on protecting your space and preventing the damage from spreading. Acting quickly gives you control, reduces stress, and helps you stay connected to the next recovery step.
Call For Damage Help
Now that you’ve stopped the water source, call a water damage restoration professional as soon as possible so they can assess the loss and begin mitigation.
You don’t have to handle this alone; a trained team can guide you through the next steps and help you protect what matters. Ask them to inspect affected areas, identify hidden moisture, and set up emergency drying equipment.
While you wait, keep people out of wet rooms, unplug appliances if it’s safe, and document visible damage with photos.
Your restoration crew will measure humidity, check structural materials, and create a drying plan tailored to your home. Fast action limits microbial growth, reduces secondary damage, and helps your property recover faster.
When you reach out quickly, you join a process built to restore comfort, safety, and confidence.
Why Fast Water Damage Restoration Matters
When water damage hits, fast restoration matters because every hour increases the risk of structural deterioration, mold growth, and more costly repairs.
You protect your home by acting quickly: stop the source, limit foot traffic, and begin drying right away. Moisture can travel behind walls, under flooring, and into insulation, so delays let hidden damage spread.
Rapid response also helps preserve finishes, reduce odors, and keep your living spaces safer for you and your family. You’ll usually save time and money when you address wet materials before they swell, warp, or break down.
Acting now helps you regain control, restore comfort, and stay connected to the place you call home. Fast action isn’t panic; it’s smart protection for your property and peace of mind.
How Pros Inspect Water Damage
You’ll see pros start with moisture mapping to trace where water has spread, even behind walls and under floors.
Next, they check the damage source so they can stop the leak or intrusion and prevent more spread.
Then they assess structural materials to see what can be dried, cleaned, or removed safely.
Moisture Mapping
Before cleanup starts, pros use moisture mapping to find exactly where water has spread and how deeply it has penetrated. You’ll see them scan walls, floors, and trim with meters, then compare readings to dry areas.
Next, they mark wet zones on a sketch or digital plan, so every affected space gets tracked. They may take thermal images to spot cooler, hidden moisture behind surfaces, and then confirm those readings with direct probes.
This step gives you a clear picture of what needs drying, what needs removal, and what can stay. You’re not left guessing, and your restoration team can work as one, with a shared map guiding each decision.
That’s how they protect your home and help you feel included in the process.
Damage Source Check
Next, pros check the source of the water so they can stop the damage at its origin. You’ll see them trace the leak path from the visible wet area back to the entry point.
They inspect supply lines, drains, fixtures, appliances, roofs, and exterior openings, using flashlights, pressure checks, and thermal tools when needed. If the water is clean, gray, or contaminated, they document it right away because that guides the next steps.
They’ll also look for active dripping, intermittent seepage, and hidden plumbing failures, then shut off the right valve or utility if possible. This step keeps your home’s response organized and your team aligned.
When the source is controlled, you can move forward with confidence, knowing the problem isn’t still feeding itself.
Structural Material Assessment
With the source controlled, pros move on to the structure itself and inspect every wet building material to see what can be salvaged and what needs removal.
You’ll see them check drywall, insulation, framing, subfloors, trim, and cabinets for swelling, delamination, warping, and staining. They use moisture meters and thermal imaging to map hidden saturation, then compare readings against dry standards.
They’ll probe soft spots, lift edges, and document each affected area so you know what’s safe to keep. If materials are porous and contaminated, they’ll recommend removal; if structural members are sound, they’ll plan targeted drying.
This step protects your home’s integrity and helps your team work together with clear, confident next moves.
How Water Extraction and Drying Work
Once the standing water is removed, technicians move quickly to extract hidden moisture and begin controlled drying, because speed limits further damage and helps prevent mold growth.
You’ll see a clear sequence that protects your home and helps you feel supported:
- High-powered extractors lift water from floors and carpets
- Air movers push moisture from surfaces and cavities
- Dehumidifiers pull humidity from the air
- Moisture meters track progress in real time
- Technicians adjust equipment until readings stabilize
You can expect them to focus on framing, baseboards, and underlayment first.
They’ll map wet zones, set equipment for balanced airflow, and monitor daily.
This step-by-step process helps your property dry evenly, so materials can recover sooner and you can move forward with confidence.
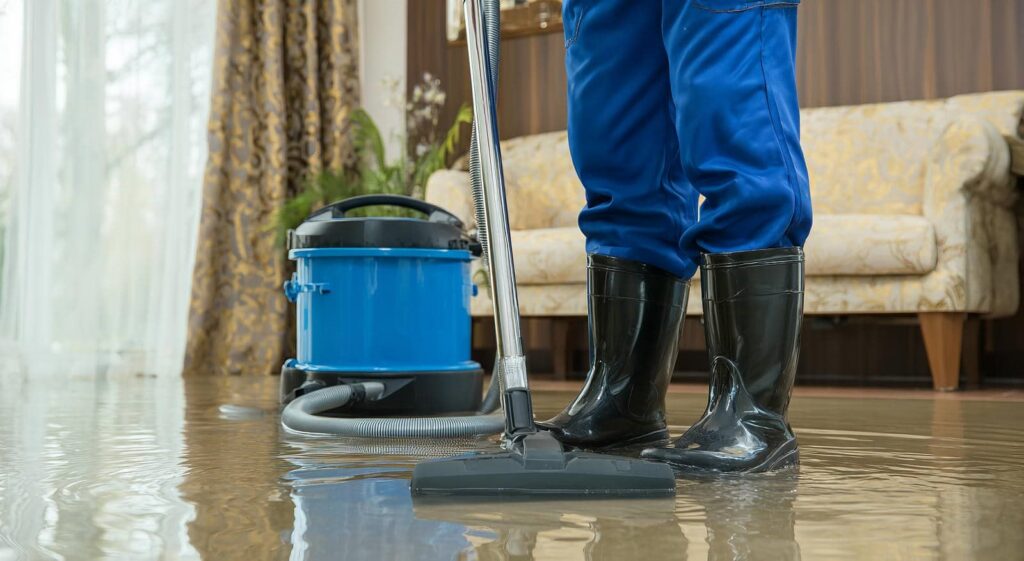
How to Clean Up Contaminated Water Safely
When contaminated water is involved, technicians first stop the source, then isolate the affected area to keep bacteria, sewage, or chemicals from spreading.
You should turn off power to wet rooms if it’s safe, then wear gloves, boots, eye protection, and a respirator.
Next, remove standing water with pumps or wet vacuums rated for hazardous cleanup, and bag debris in sealed containers.
Clean hard surfaces with approved disinfectants, following label contact times so the solution can kill pathogens effectively.
Ventilate the space with fans and open pathways for fresh air, but don’t agitate sewage or chemical residue.
After cleaning, sanitize tools, wash hands thoroughly, and dispose of contaminated materials according to local rules.
If odors, stains, or exposure risks remain, call a licensed restoration team.
How to Salvage Floors, Walls, and Belongings
Start by sorting what can be saved from what needs removal, because every hour of drying matters. You’ll protect your home best when you work methodically and keep moving.
Lift wet rugs, pads, and movable furniture.
Remove standing water from floors with a wet vac.
Pull baseboards only where walls stayed damp.
Open wall cavities and flooring layers for airflow.
Bag salvageable belongings, label them, and place them in a dry room.
For solid-surface floors, clean, dry, and inspect for warping or loosened seams.
For drywall, cut back only the softened sections to help remaining material dry.
For books, photos, and textiles, air-dry them flat or hang them with space between items.
Stay organized, wear gloves, and set each piece aside for review so you feel in control and supported.
How to Prevent Mold After Water Damage
After you’ve removed what can’t be saved, your next job is to stop mold before it starts.
First, open windows, run fans, and use dehumidifiers to pull moisture from the air. Then, clean hard surfaces with soap and water, and dry them completely.
Check behind baseboards, under sinks, inside closets, and around vents, because hidden dampness keeps mold alive. If you spot wet insulation, drywall, or carpet padding, remove it quickly.
Keep indoor humidity low and monitor it with a simple meter. Don’t put furniture back until floors and walls feel fully dry.
If you’re unsure whether a space is safe, trust your instincts and get a qualified inspector. You’re not handling this alone; steady action now protects your home and your peace of mind.
What Water Damage Restoration Costs
Your restoration cost depends on the water source, the size of the affected area, how long the damage has been present, and whether drying, demolition, or mold treatment is needed.
You’ll usually get a more accurate estimate after a technician inspects moisture levels and identifies hidden damage.
If you have insurance, review your policy early, because coverage can lower your out-of-pocket cost when the claim meets the plan’s terms.
Cost Factors
Water damage restoration costs depend on how much water entered the home, how long it sat, and which materials were affected. You can expect a technician to assess the loss, classify the water, and estimate labor, equipment, and drying time. Quick action usually lowers cost because it limits demolition and microbial growth.
- Water source and contamination level
- Affected area size
- Drywall, flooring, or insulation removal
- Equipment needs, like dehumidifiers and air movers
- Structural repairs and finish replacement
You’re not facing this alone; a clear scope helps you plan each step. Ask for a written assessment, then compare the work needed with your home’s condition.
The more promptly you respond, the more controlled the process becomes, and the better your restoration outcome can be.
Insurance Coverage
Insurance coverage can soften the financial hit if you act fast and document the damage well.
First, review your policy to see whether it covers sudden water events, like burst pipes or appliance failures, and note any exclusions for floods, neglect, or long-term seepage.
Next, call your insurer immediately, open a claim, and ask what emergency mitigation costs they’ll reimburse.
Take date-stamped photos, save damaged items, and keep every receipt for drying, extraction, and repairs.
If an adjuster visits, walk them through the loss and share your contractor’s estimates.
You’re not maneuvering through this alone; your insurer, restoration team, and you can work together.
When you know the rules, you can protect your home, your budget, and your peace of mind.
How to Choose a Water Damage Restoration Company
When selecting a water damage restoration company, start by confirming that the team responds quickly, offers 24/7 emergency service, and has experience handling the type of damage in your home.
Next, verify they use moisture meters, thermal imaging, and controlled drying to stop hidden decay. Ask for written scopes, clear pricing, and proof of licensing and insurance so you’re protected.
Choose a crew that communicates clearly and treats your home like part of the neighborhood:
- Fast arrival
- Certified technicians
- Detailed inspection
- Direct insurance help
- Daily progress updates
You deserve a team that works methodically, explains each step, and keeps you informed.
That support helps you feel grounded while your property is restored.
Frequently Asked Questions
How Long Does Insurance Approval Usually Take?
Insurance approval usually takes 1–7 days, like a gate opening after a storm. You’ll submit photos, estimates, and your claim, then the adjuster reviews it. Fast, complete paperwork helps you move forward sooner.
Can I Stay in My Home During Restoration?
Yes, you can often stay home, but you’ll need to check safety first. You’ll follow your crew’s guidance, isolate affected rooms, and avoid equipment zones. If contamination, mold, or structural damage exists, you shouldn’t stay.
Will My Belongings Be Inventoried for Claims?
Yes, you’ll usually have your belongings inventoried for claims; water losses need detailed documentation. You’ll photograph items, list losses, and your team will help you organize everything step by step.
What Paperwork Should I Save After Water Damage?
Save photos, damage estimates, repair invoices, receipts, inventory lists, insurance claim forms, contractor reports, and communications. Keep everything organized, dated, and backed up so you can prove losses and speed your claim.
Are Repair Permits Needed After Restoration?
Yes, you’ll often need permits for structural repairs, electrical work, or plumbing tweaks. Check with your local building office first, then let your contractor file paperwork, schedule inspections, and keep you in the loop.
Conclusion
You protect your home by acting fast, by choosing skilled pros, and by following each drying step carefully. You stop damage when you call for help early, you reduce mold risk when you remove moisture quickly, and you save more belongings when you stay organized throughout the process. With the right restoration company, you can restore your space, restore your peace of mind, and restore your confidence after property loss.