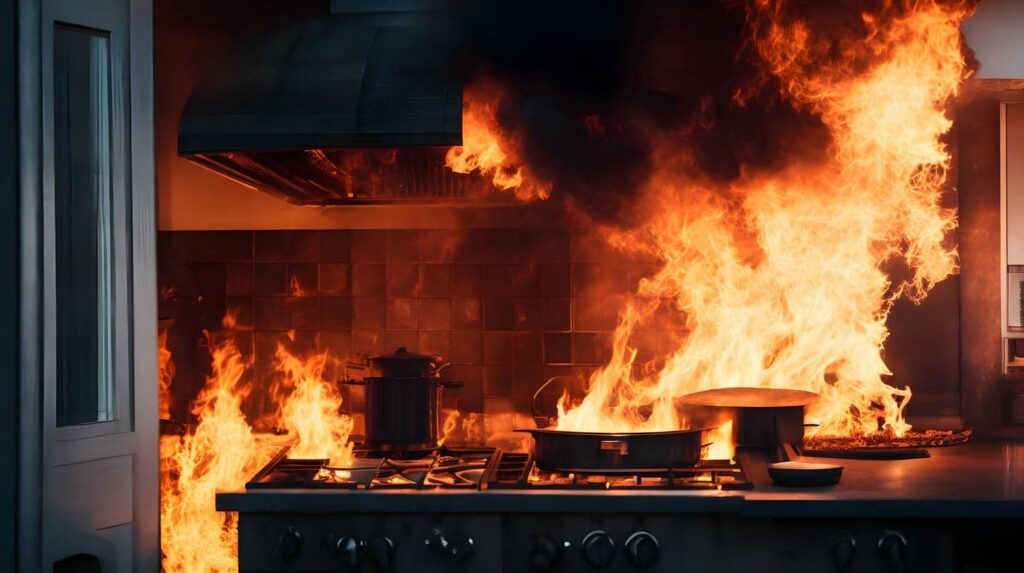
After a fire, you need a clear restoration plan that moves from emergency cleanup to final repairs. You’ll first secure the property, assess what can be saved, and remove damaged debris. Then specialists clean soot, smoke, and residue, control odors, and dry out water from firefighting efforts. From there, they evaluate structural repairs and rebuild compromised walls, floors, and fixtures—often where the full scope becomes clear.
Key Takeaways
- Inspect the property first to assess damage, salvageable materials, smoke penetration, and water impact.
- Remove unsafe debris and charred materials to create a safe, documented work area.
- Clean soot, smoke, and residue using appropriate dry and wet methods for each surface.
- Eliminate odors and manage water damage with deodorization, ventilation, dehumidifiers, and mold prevention.
- Repair and rebuild damaged structures, verifying safety, code compliance, and finished details throughout.
Fire Damage Restoration: What to Expect
When you begin fire damage restoration, you can expect a structured process that starts with a detailed inspection of the affected area.
From there, your team maps damage, identifies salvageable materials, and documents conditions so nothing important gets missed.
In the fire damage restoration process, technicians remove debris, clean soot from surfaces, and address smoke residue with targeted methods matched to each material.
You’ll also see odor control measures that help neutralize lingering smells at the source, not just mask them.
Next, professionals create a repair plan that prioritizes safety, function, and a smooth return to normal.
Throughout the work, you’re kept informed, so you know what’s happening and why.
That steady communication helps you feel included, supported, and ready for each step.
Secure the Property and Assess the Damage
Before any cleanup begins, the restoration team secures the property to prevent further damage and make the site safe for work. You’ll see doors, windows, and exposed openings boarded or tarped, utilities shut off when needed, and hazard zones clearly marked. This controlled setup protects your home or business and helps you feel confident that the next steps are organized.
After that, the team performs a detailed assessment. They document structural exposure, smoke penetration, heat impact, water from suppression efforts, and affected contents.
Moisture readings, photos, and notes guide the restoration plan. You stay informed at each stage, so you know what’s been damaged, what can be stabilized, and what needs repair. That clarity helps you move forward with your property restoration team.
Remove Debris and Unsalvageable Materials
You’ll first identify materials that are structurally unsafe, heavily charred, or contaminated beyond repair.
Then you’ll clear fire debris from the affected area to create a safe, workable space for cleanup and restoration.
This step helps you remove hazards efficiently while preparing the property for the next phase.
Identify Unsafe Materials
Once the structure is safe to access, you should identify and remove materials that can’t be salvaged, including charred debris, weakened drywall, compromised insulation, and heavily smoke-damaged contents.
You’ll inspect framing, sheathing, and finishes for heat distortion, brittleness, or hidden moisture that can weaken performance. Mark any material that crumbles, delaminates, or carries persistent soot residue so your team can isolate it quickly.
You’re not just cleaning; you’re protecting the build from future failures and helping everyone work with confidence. Wear proper PPE, keep contaminated items separated, and document what you remove for the repair plan.
When you handle unsafe materials methodically, you create a clearer path for your crew and restore a sense of order after loss.
Clear Fire Debris
With unsafe materials identified, you can begin clearing fire debris by removing charred framing, collapsed finishes, ruined insulation, and any contents that can’t be restored.
You’ll sort debris into salvageable and non-salvageable groups, then bag, load, and dispose of waste according to local codes.
As you clear each area, expose hidden damage so your team can verify structural stability, assess soot migration, and prepare for smoke cleanup.
Keep pathways open, control dust, and use sealed containers to limit cross-contamination.
If water from firefighting remains, remove soaked materials before mold starts.
This step resets the space and gives you a clean foundation for the next repairs.
You’re not clearing alone; you’re making room for your home to recover safely, methodically, and with confidence.
Clean Soot, Smoke, and Residue
After the initial inspection, the restoration team cleans soot, smoke, and residue from affected surfaces to prevent further damage and reduce lingering contamination.
You’ll see technicians choose the right dry and wet methods for each material, then lift deposits without spreading them. They’ll treat walls, ceilings, fixtures, and contents with controlled cleaning agents, and they’ll keep your space organized so you can feel confident in each step.
This careful work helps protect finishes, limits corrosion, and prepares the structure for repair. You’re not dealing with this alone; your restoration team works with you and respects your home.
- You regain control.
- Your belongings get careful attention.
- Your space starts to feel safe again.
Clean surfaces support the next phase and make recovery feel real.
Remove Smoke Odor
You’ll first identify the odor source, since smoke particles can embed in porous materials, HVAC components, and hidden cavities.
Then you’ll use deep deodorization methods, such as thermal fogging, hydroxyl treatment, or ozone, to neutralize residual smoke compounds at the molecular level.
To finish, you’ll treat the air with filtration and ventilation so you can restore a clean, safe indoor environment.
Odor Source Assessment
Smoke odor often lingers because soot particles, charred materials, and residues remain embedded in porous surfaces. You’ll assess every likely source so nothing hidden keeps affecting your space or comfort.
Inspect walls, ceilings, insulation, HVAC returns, fabrics, and subfloors for contamination, staining, and heat damage. Use your nose, visual checks, and moisture readings to pinpoint where odor concentrates. This step helps you understand what needs removal, cleaning, or sealing before repairs begin.
- You regain confidence when the cause is identified.
- You feel safer when lingering contamination is mapped.
- You can move forward knowing your home’s air is being addressed.
A careful assessment gives you and your household a clear path forward, reduces uncertainty, and supports a cleaner, more familiar place to return to.
Deep Deodorization Methods
Once odor sources are mapped, deep deodorization can target the contamination that standard cleaning can’t reach.
You’ll usually need thermal fogging, hydroxyl treatment, or ozone applied by trained technicians to break down smoke molecules trapped in porous materials, cavities, and hidden seams.
We’ll also use detailed cleaning on surfaces, fabrics, and HVAC components so residues don’t keep re-releasing odor.
You should expect controlled dwell times, sealed spaces, and repeated verification until the smell no longer returns.
These methods work best when you combine them with source removal, because masking won’t restore your space.
With a precise plan, you can breathe easier and feel confident that your home or business is being brought back to a clean, familiar condition.
Air Quality Treatment
Air quality treatment tackles the airborne smoke particles and residual odors that linger after the visible damage is addressed.
You’ll improve indoor conditions by combining HEPA filtration, activated carbon adsorption, and targeted ventilation to capture fine soot and VOCs. Technicians monitor particulate levels, adjust equipment placement, and verify that airflow reaches closed rooms and hidden cavities.
This process helps you breathe easier and feel like your home is becoming yours again.
- You notice cleaner air and less throat irritation.
- You regain confidence that smoke won’t keep spreading.
- You feel supported as each treatment step restores comfort.
When you need steady progress, this phase gives you measurable results and a clear path toward normal living.
Dry Out Firefighting Water Damage
After the fire is out, you still need to dry the water left behind by hoses, sprinklers, and firefighting efforts to prevent secondary damage. You should start fast, because moisture can seep into framing, subfloors, and insulation within hours.
A restoration team will assess saturation, then use pumps, extraction tools, air movers, and dehumidifiers to remove standing water and lower humidity. You’ll also need targeted airflow in enclosed spaces so hidden dampness doesn’t turn into warping or microbial growth.
Technicians monitor moisture levels with meters and adjust equipment until materials reach safe drying targets. This step protects structural integrity, limits odor, and prepares your property for the next phase of restoration.
You’re not handling this alone; you’ve got a process designed to restore order and confidence.
Clean Salvageable Belongings
Next, you’ll clean salvageable belongings to stop soot, smoke residue, and corrosive contaminants from setting in.
You’ll sort items by material, then use the right method for each surface to protect what matters most to your family and routines.
Soft goods need controlled washing or dry cleaning, while hard goods often require HEPA vacuuming, gentle wiping, and approved detergents.
Work from cleanest to dirtiest so you don’t spread contamination. Keep items labeled and separated to maintain order and reduce stress.
- Your photos and keepsakes can feel safe again.
- Your clothing and linens can return to daily use.
- Your trusted belongings can help restore comfort.
Assess Structural Repairs
Once the cleanup is complete, you’ll assess structural repairs to determine what’s safe, what’s damaged, and what needs immediate attention.
You’ll inspect load-bearing walls, framing, beams, joists, and roof supports for heat distortion, charring, cracking, or loss of strength. You’ll also check foundations, subfloors, and openings for shifting or water-related deterioration from suppression efforts.
A qualified specialist can document damage, verify code compliance, and prioritize repairs so you can move forward with confidence. This step helps you protect your home, your crew, and your timeline by confirming which structural elements still perform as intended.
When you know the scope, you’re part of a clear recovery plan, and that makes the next phase feel far more manageable.
Rebuild Walls, Floors, and Fixtures
With the repair plan in hand, you can rebuild the damaged structure by replacing compromised walls, floors, and fixtures in a controlled sequence. You’ll frame new sections, verify plumb lines, and anchor assemblies to code-compliant supports.
Then you’ll install subflooring, underlayment, and finish surfaces that restore strength and clean lines. Next, you’ll fit cabinetry, trim, doors, and mechanical fixtures so each system works together without gaps or strain.
- You regain a space that feels steady again.
- You see progress turn loss into home.
- You rebuild with a team that understands your goals.
Throughout, you’ll inspect moisture levels, fasteners, and finishes, confirming every detail meets specifications. This careful process helps your home feel whole, safe, and ready for daily life.
Frequently Asked Questions
How Long Does Fire Damage Restoration Usually Take?
You’ll usually need days to several weeks, depending on damage size, smoke cleanup, and repairs. You can expect inspection, debris removal, odor control, and planning first, then restoration once conditions’re safely stabilized.
Does Insurance Cover All Fire Restoration Costs?
Not always; your policy may cover fire restoration, but limits, deductibles, and exclusions apply. One homeowner I helped recovered 82% after smoke cleanup. You’ll want to review coverage, document losses, and coordinate closely with adjusters.
Can I Stay in My Home During Restoration?
You might stay if damage’s limited and crews isolate work areas, but smoke, soot, structural issues, or utilities often make relocation safer. You’ll get a clear assessment and guidance so you can choose confidently.
How Should I Choose a Fire Damage Restoration Company?
Choose a company that you trust by checking certifications, insurance, 24/7 response, detailed inspections, smoke cleanup expertise, odor control methods, and repair planning. You’ll feel supported when they explain each step clearly and promptly.
What Documents Should I Keep for My Insurance Claim?
You should keep photos, itemized inventories, receipts, estimates, contractor reports, police or fire reports, and insurer correspondence. Each paper becomes a thread, weaving your claim together, proving loss clearly and helping you belong in recovery.
Review
In the end, you can expect a careful path from first inspection to final rebuild. You secure the property, clear away losses, and let specialists lift soot, smoke, and lingering odors. You also dry hidden moisture and clean what can be saved. Then structural repairs begin, restoring walls, floors, and fixtures with code-compliant care. With each step, your home moves from hardship toward recovery, and you regain a safe, functional space.